Connect to Azure from Github Actions
- version control
- 2024-02-19
- 8 minutes to read
Introduction
This is part of a series of posts exploring how to interact with different data services in Azure from Github and Azure DevOps. In this post, I will show you how to authenticate Github Actions with Azure.
Pre Requisites
To follow along with this you are going to need:
- An Azure subscription
- A Github account
- Permissions to create service principals in Azure
- Permissions to create secrets in Github
Options for authenticating with Azure
The primary objective is to use Azure login action to authenticate with Azure to allow you to interact with other resources. According to the docs, there are two ways to authenticate:
- Service principal with secrets
- OpenID Connect (OIDC) with an Azure service principal using a Federated Identity Credential
Lots of words, but what does it mean? Let’s break it down…
In both cases you need to use a service principal to authenticate. Consider a service principal as a security object within Microsoft Entra that represents an application. This service principal can be assigned to roles in Azure to grant access to resources.
Service principal with secrets
You can create a secret for a service principal and that secret will allow you to authenticate with Azure as the aforementioned service principal. This approach has been the most common way to authenticate however, there is some downsides. The secret must be stored somewhere in order to be used by your application, and secrets also have an expiry date therefore, secrets need to be rotated. If a secret expires and you haven’t rotated it then no access for you! What I have seen happen in many cases is that a secret will be set to a really long expiry date so that it doesn’t need rotating regularly, but the longer a secret is in use the more likely it is to be compromised.
OpenID Connect (OIDC) with an Azure service principal using a Federated Identity Credential
Wordy…let’s just call it Service Principal with federated credentials. How this works is by defining a trust between Azure and Github specifically for this service principal. This credential is restricted in scope and there are no secrets to manage.
Create service principals
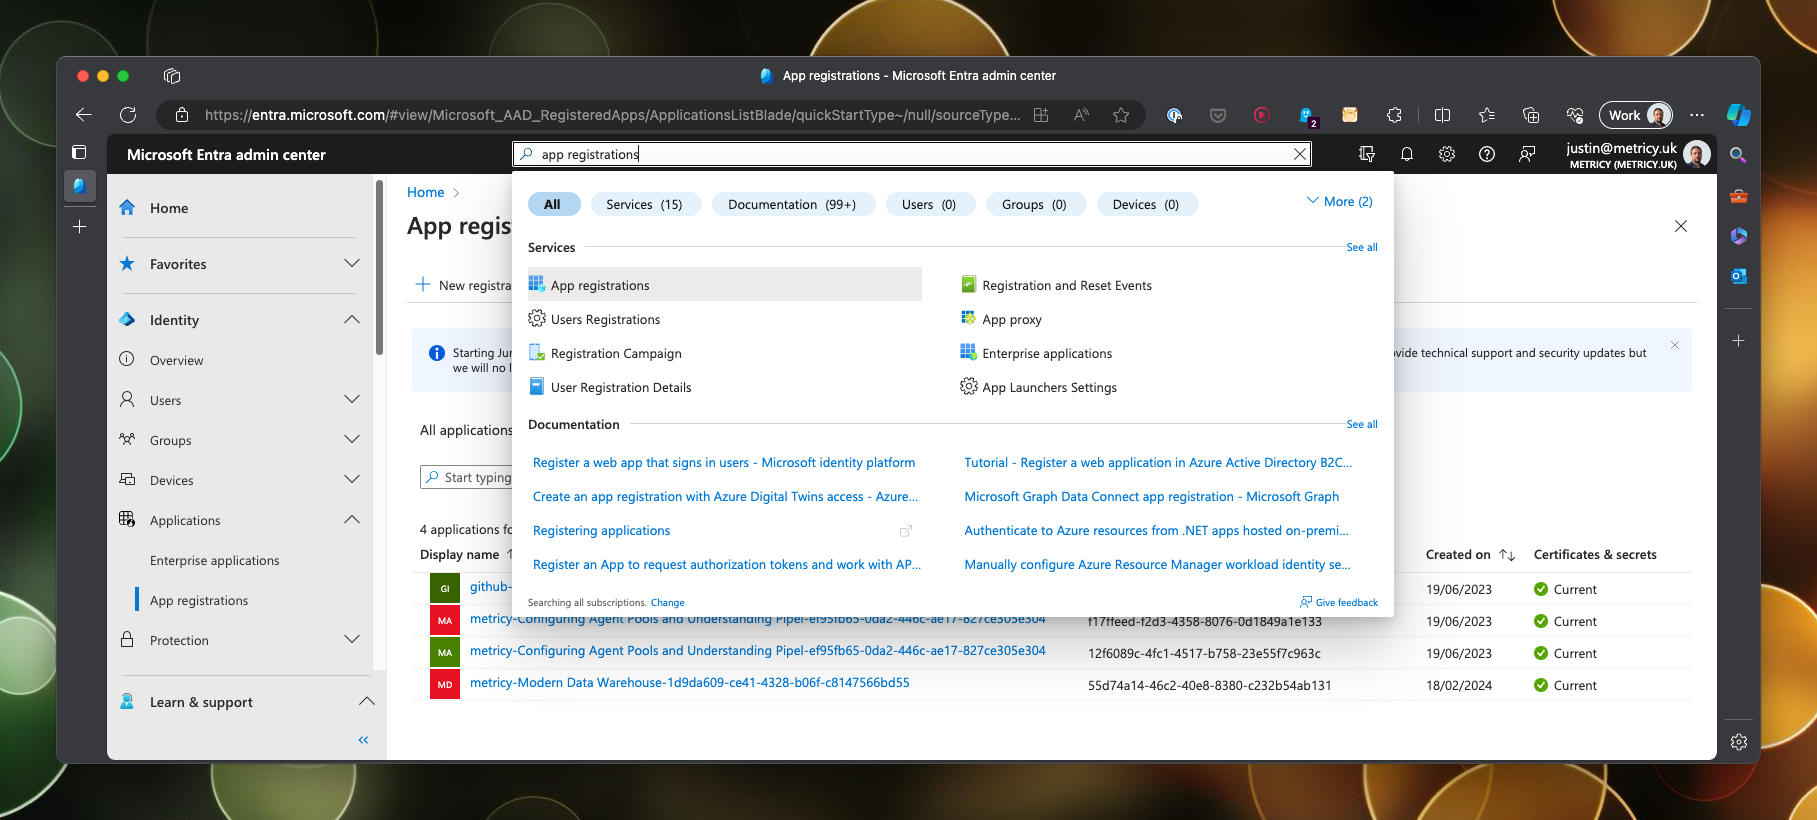
I am going to set up two service principals, one for each method of authentication. Service principals are set up in App registrations in Microsoft Entra admin center . These menus can move about a bit so rather than providing you a path, use the search menu…
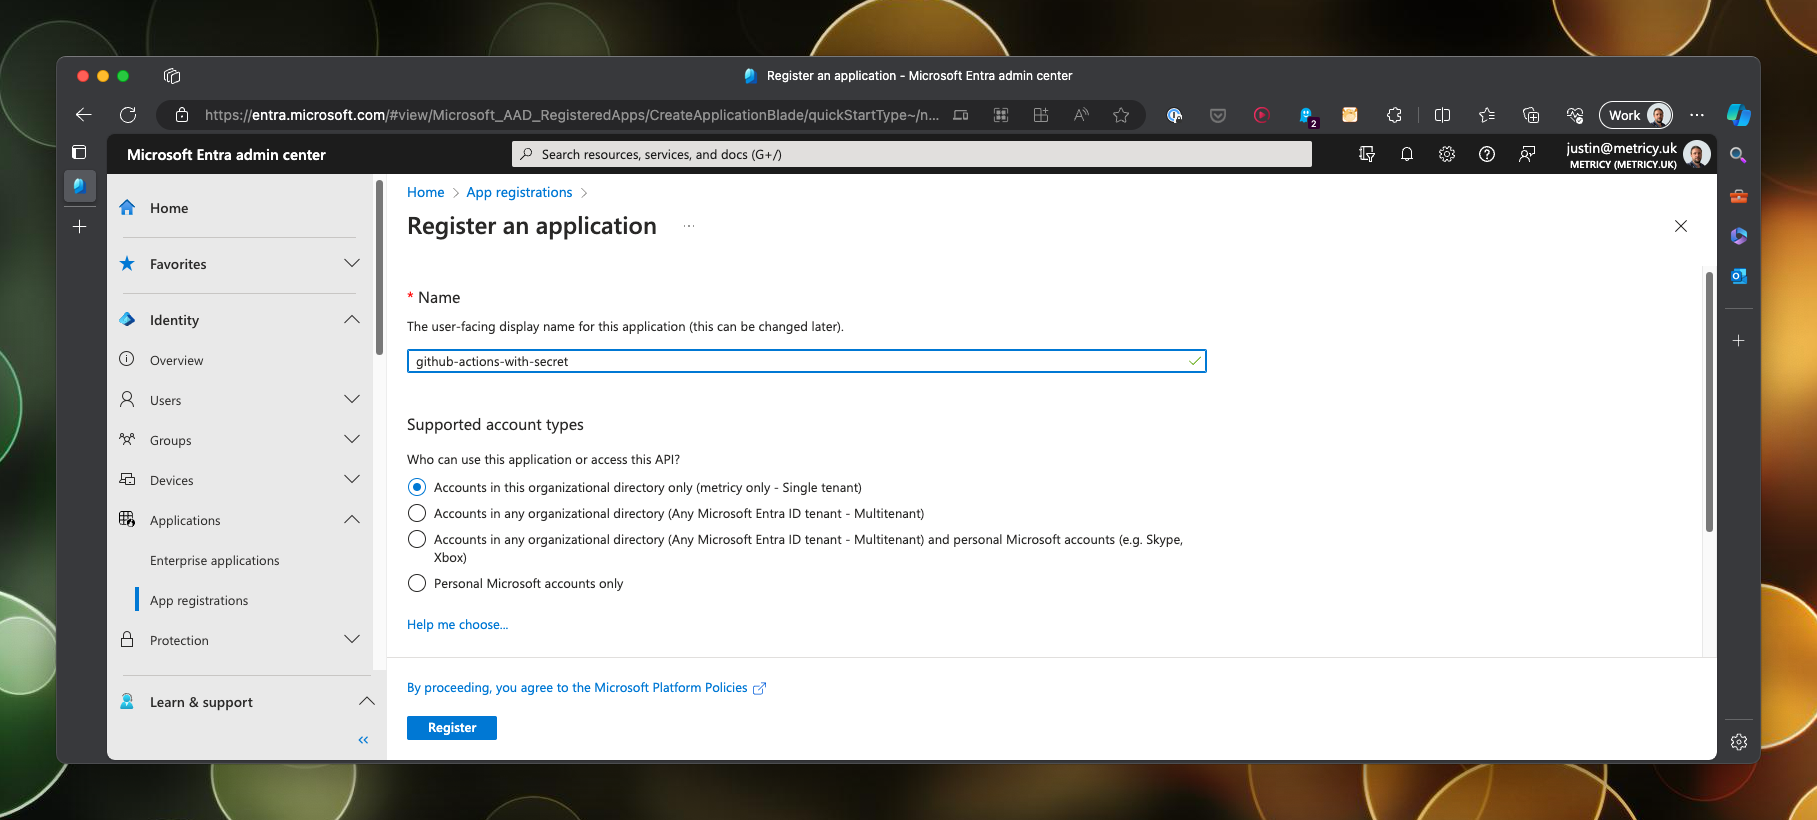
We will create two service principals, one called github-actions-with-secret and one called github-actions-with-federated-credential. Create a new registration and give it a name, repeat for the second service principal.
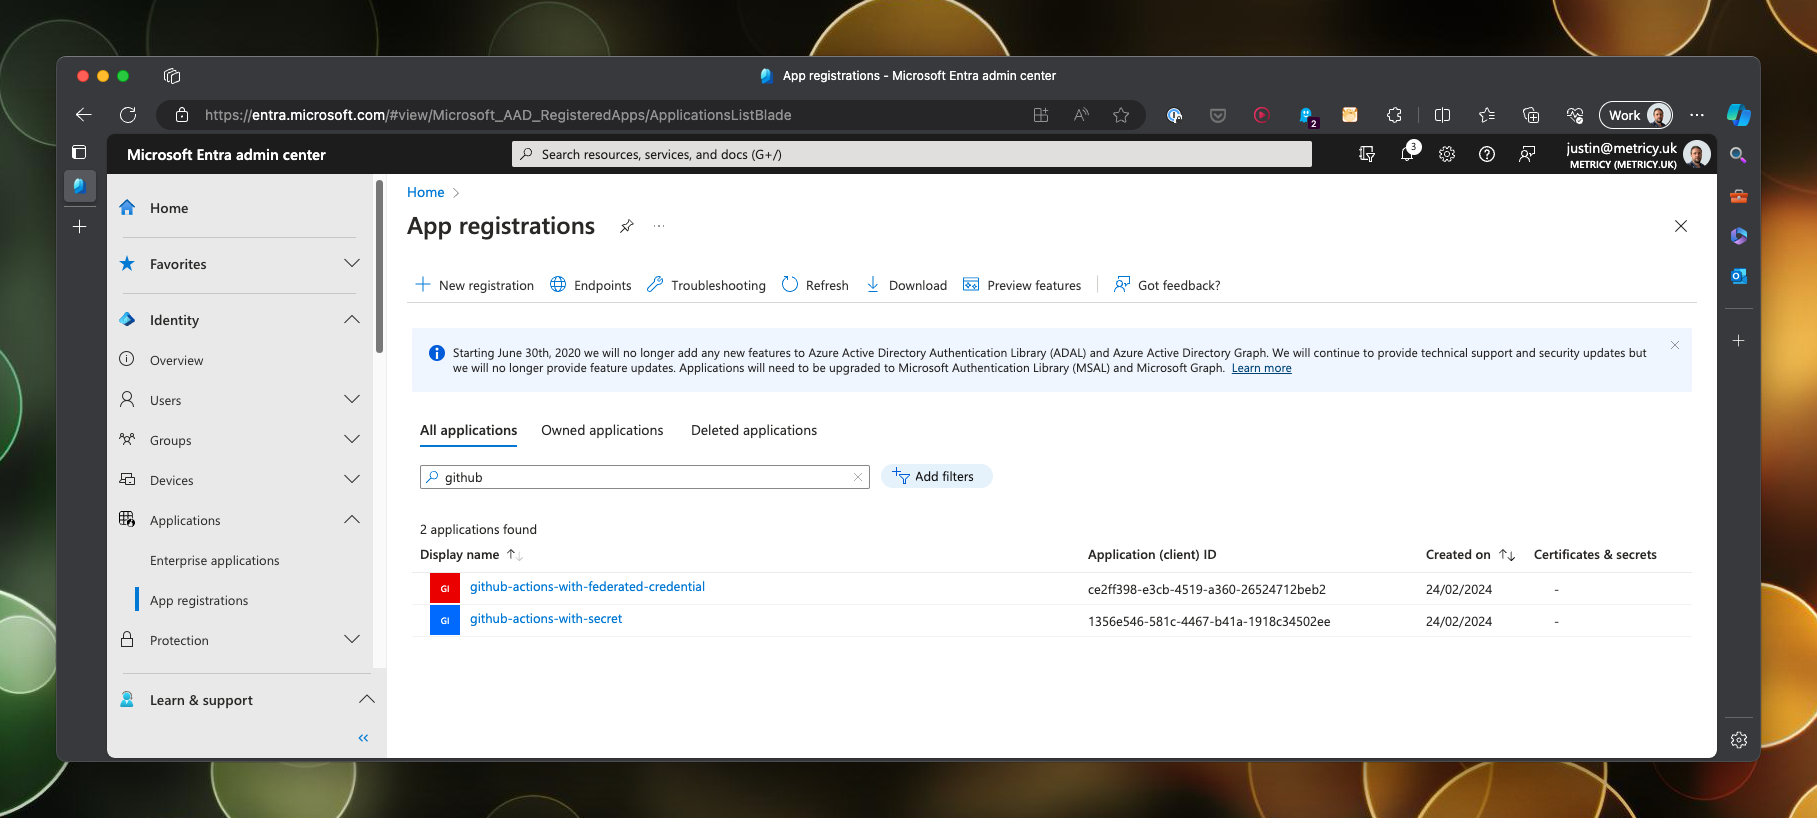
You should now have two registered applications…
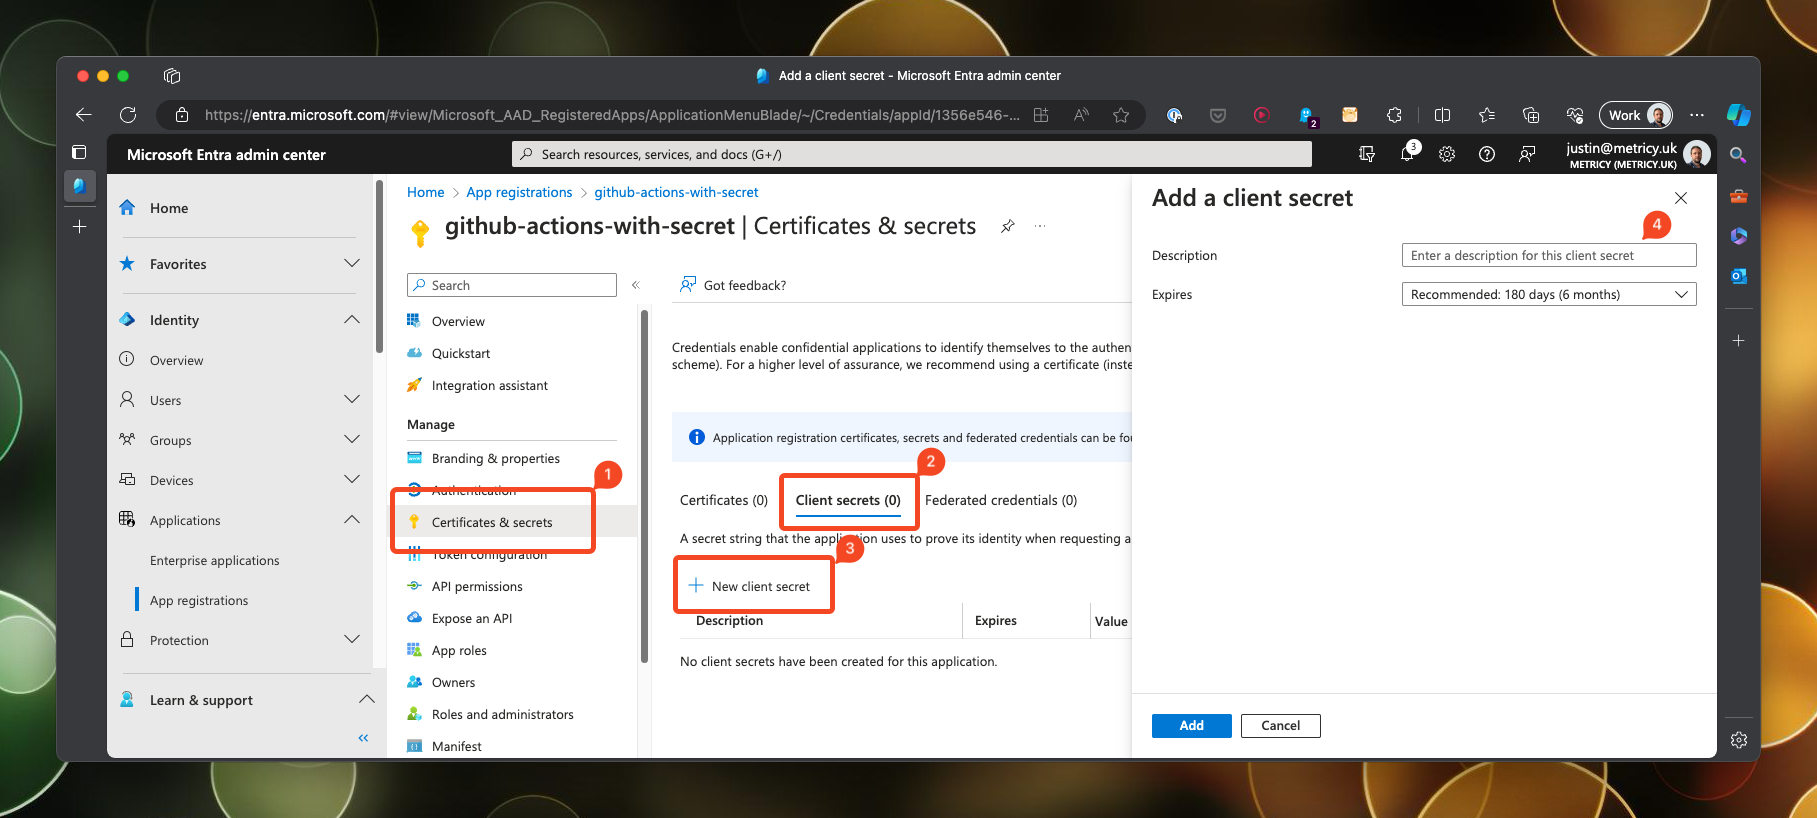
Create client secret
To create the client secret, open up the service principal and navigate to the certificates & secrets section. Click on New client secret and give it a description and an expiry date.
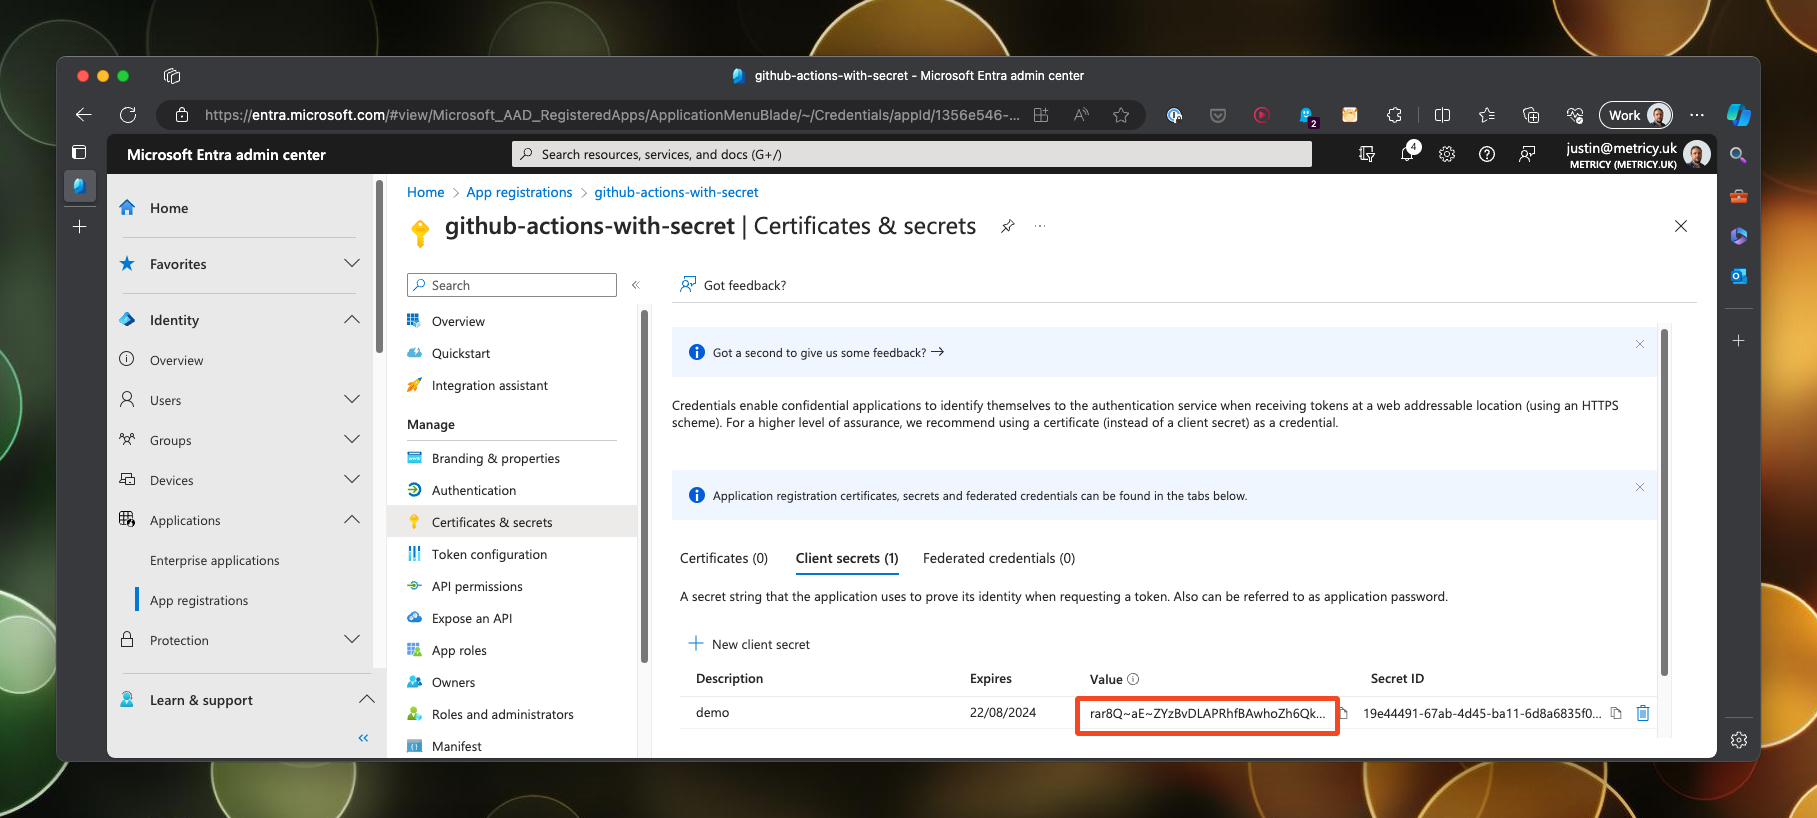
Once the secret is created, you will need to make a note of the secret value as once you leave this page it will not be displayed again!
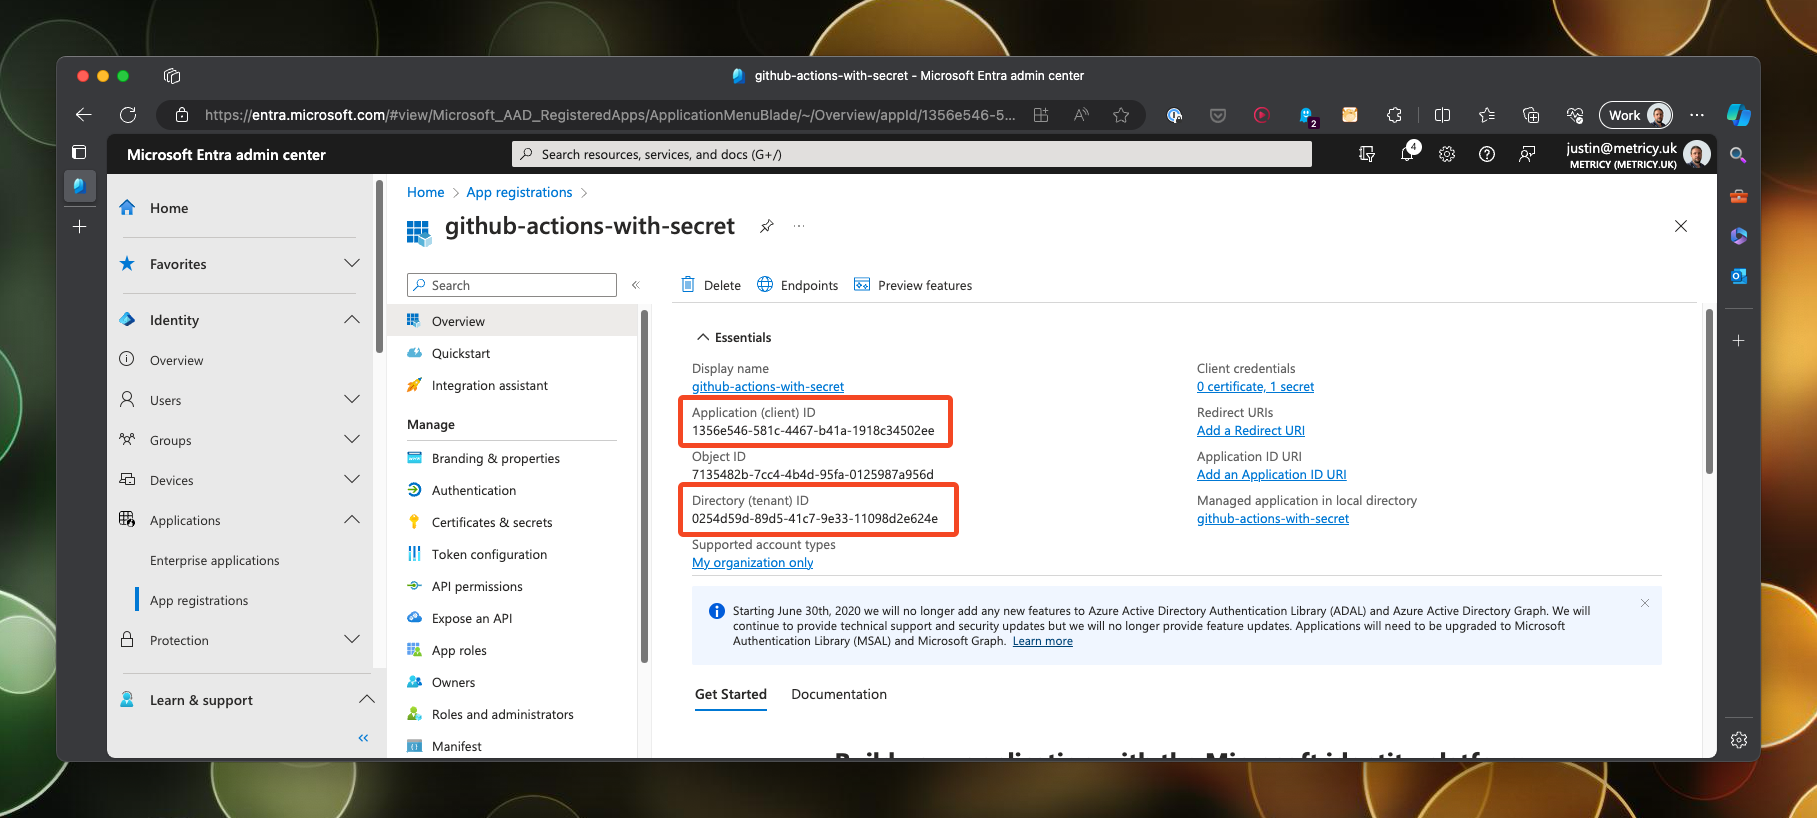
Final step, is to make a note of the client ID and the tenant ID, both of which will be needed to construct our secret in Github.
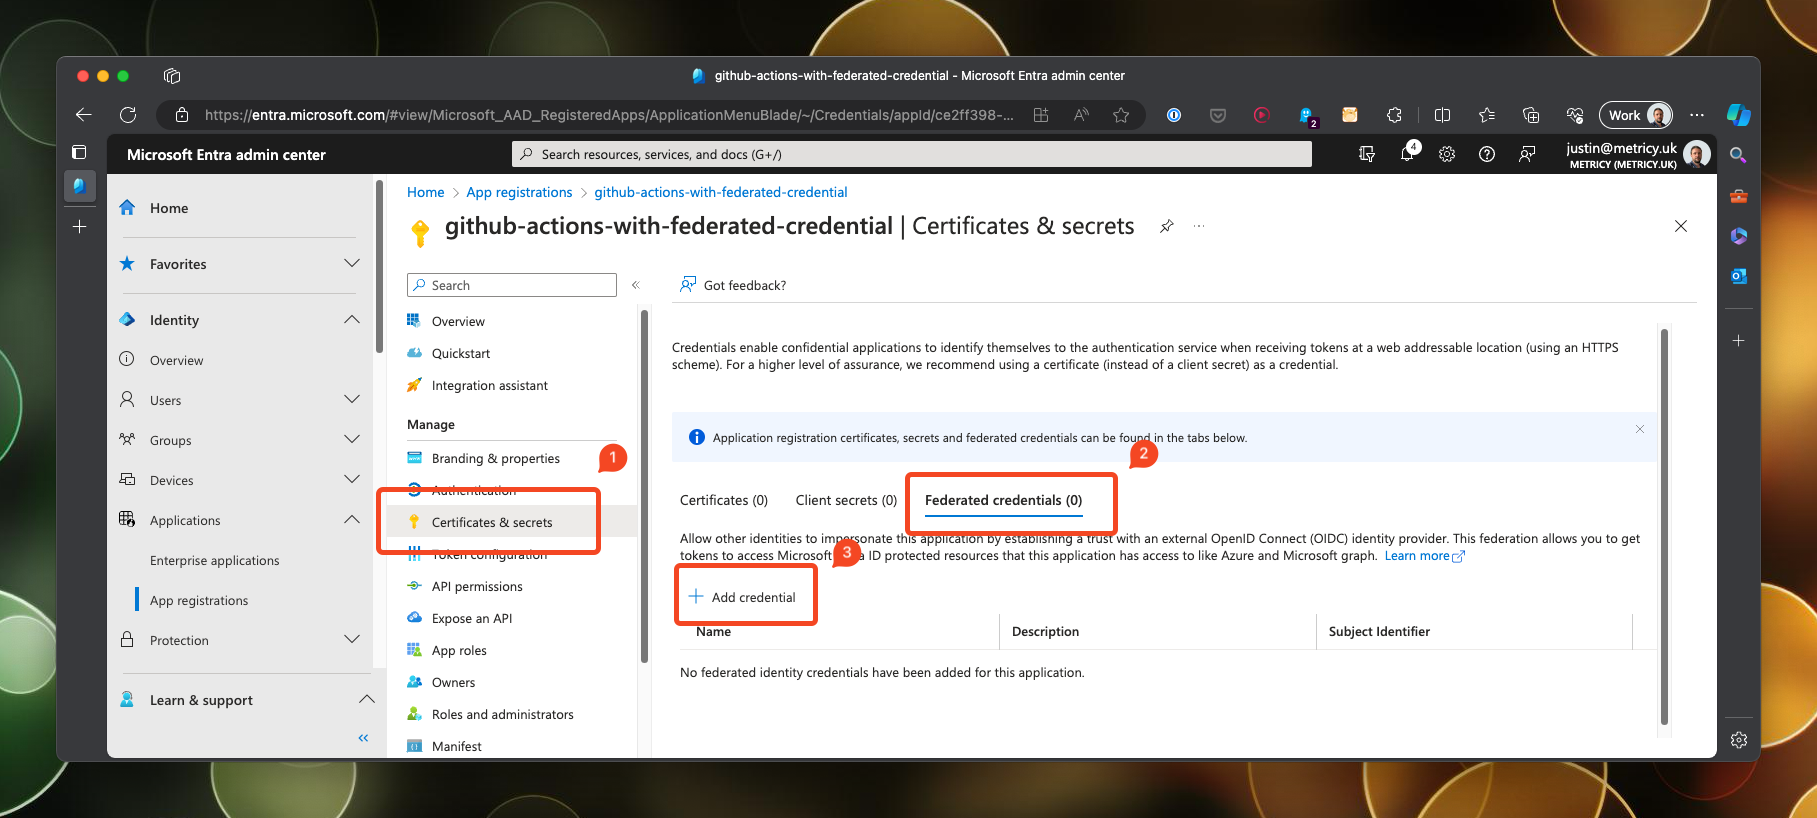
Create a federated credential
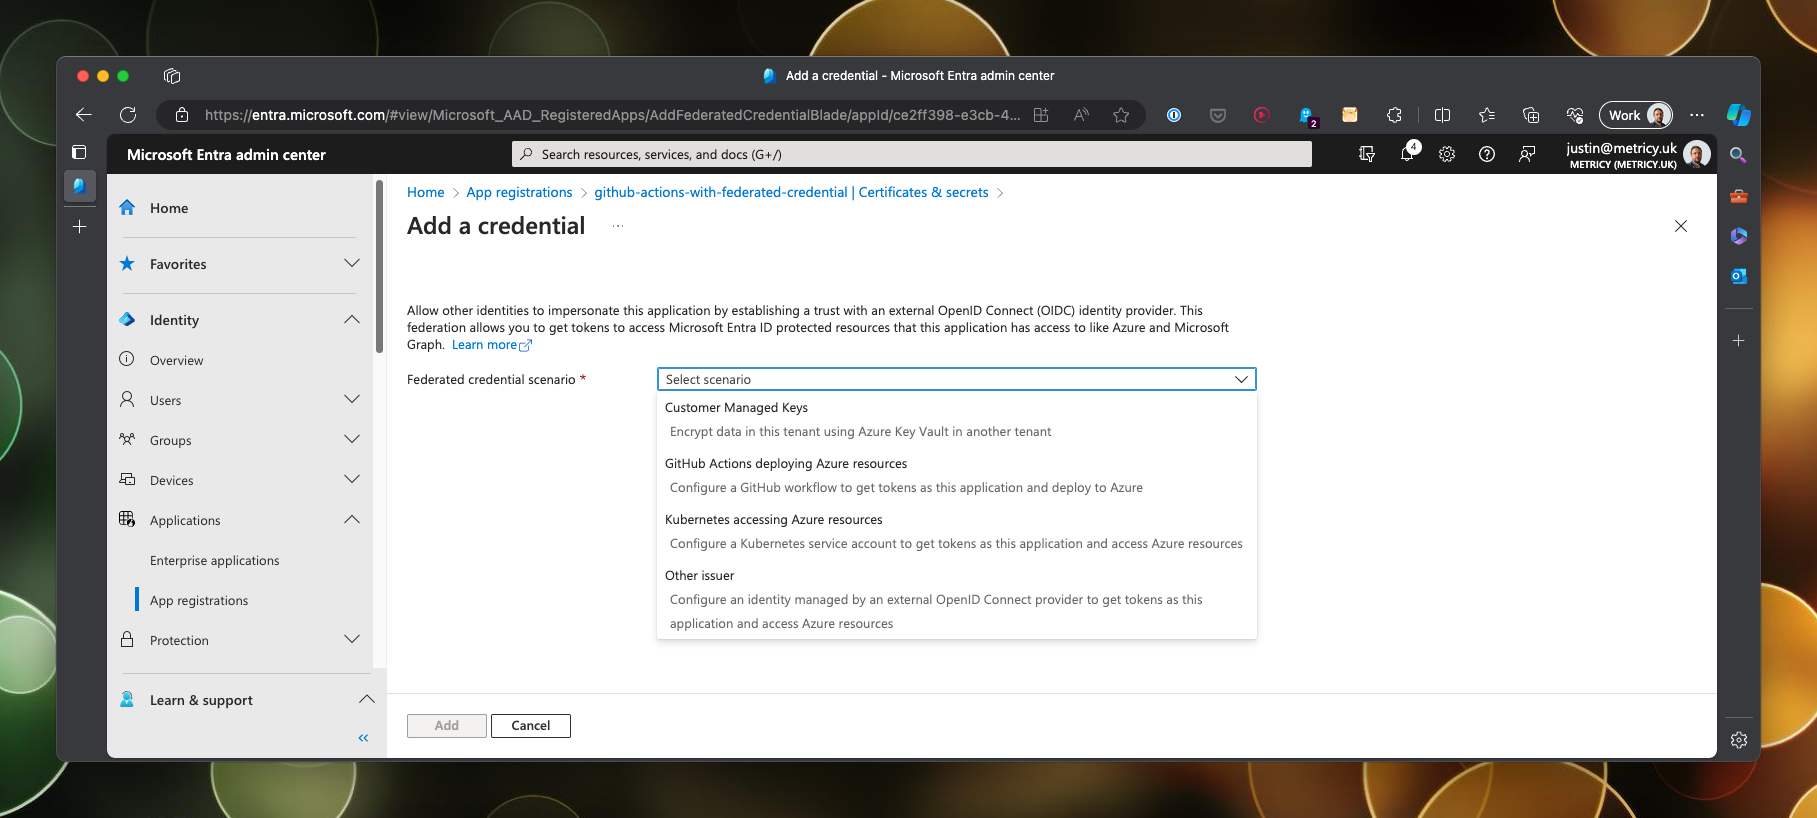
To create a federated credential, open up the service principal and navigate to the certificates & secrets section. Click on Add credential.
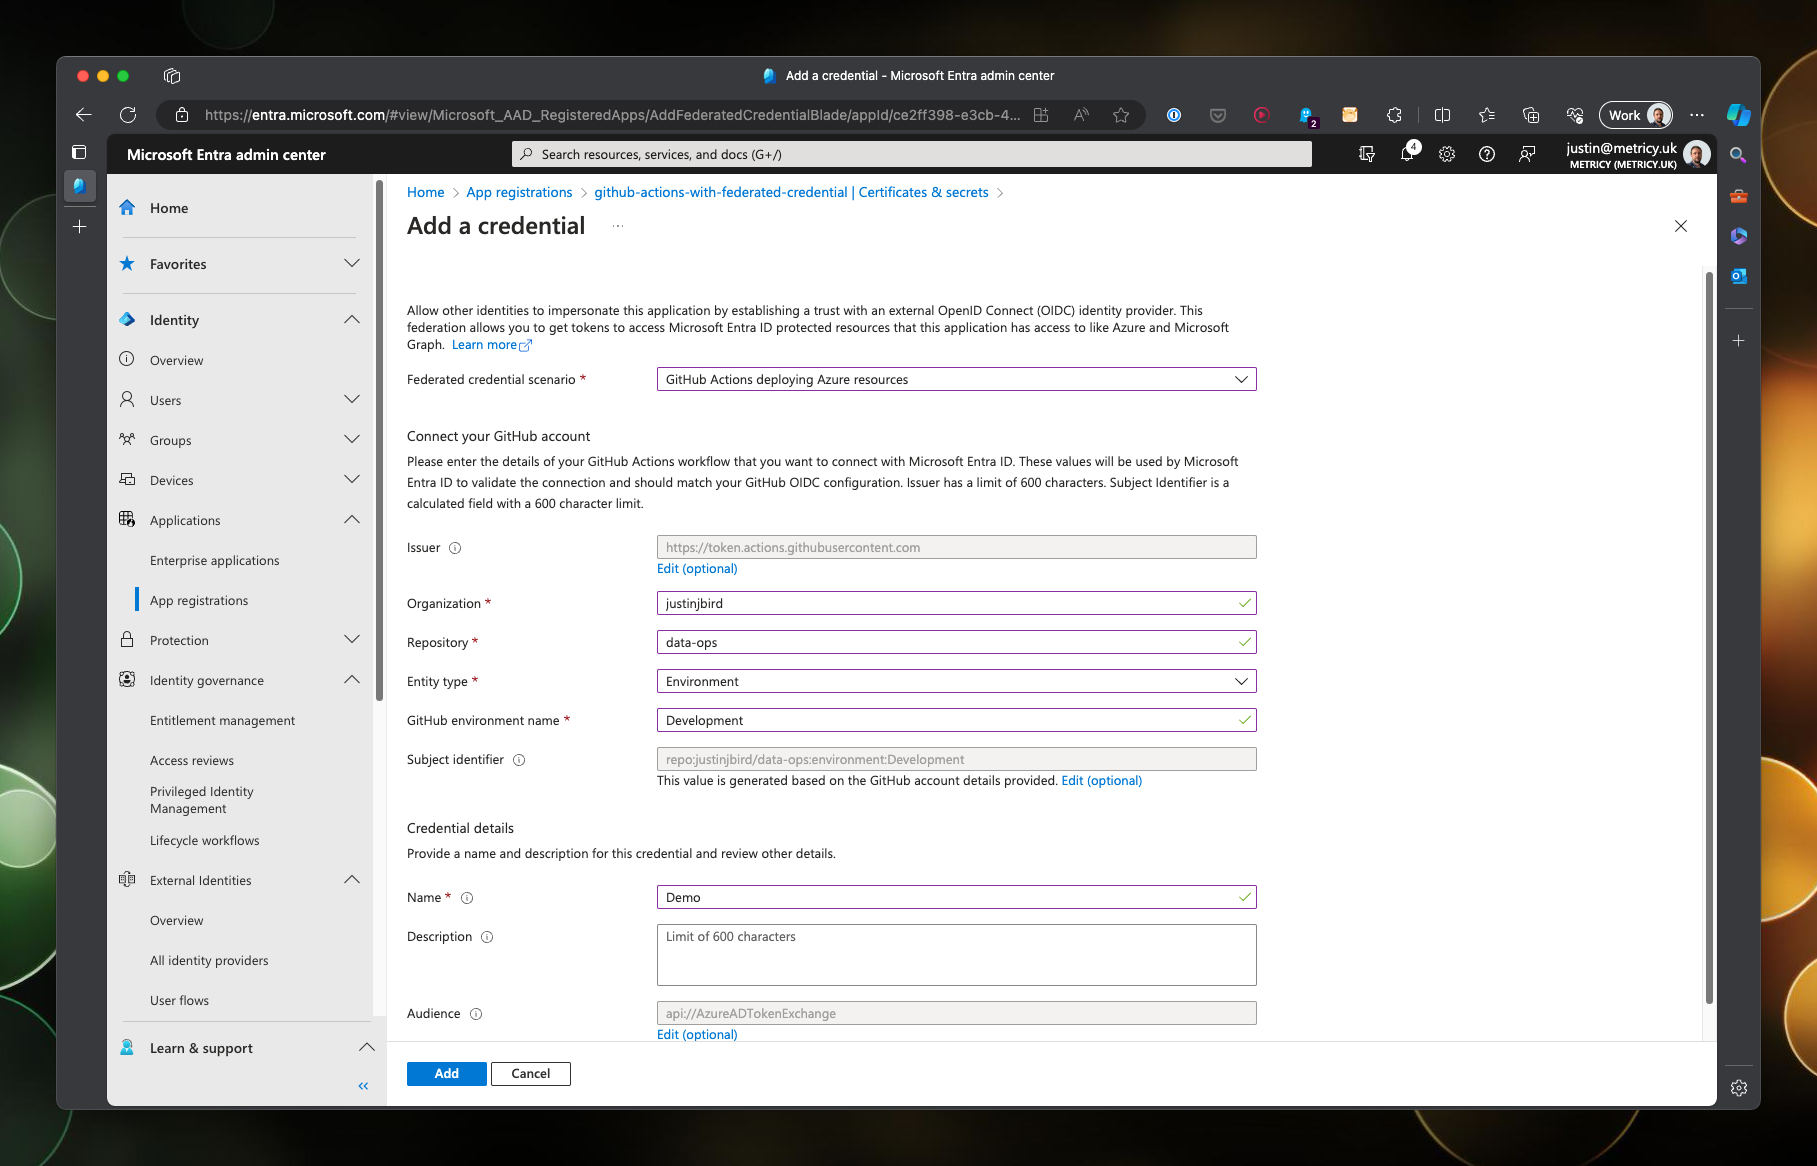
There is a bit more to configure here, first you need to select the scenario to restrict the scope to Github, open the drop down and choose Github Actions.
You are then required to select the repository that you want to restrict access to. This configuration will further restrict the scope, meaning we will only be able to authenticate from the configured repository.
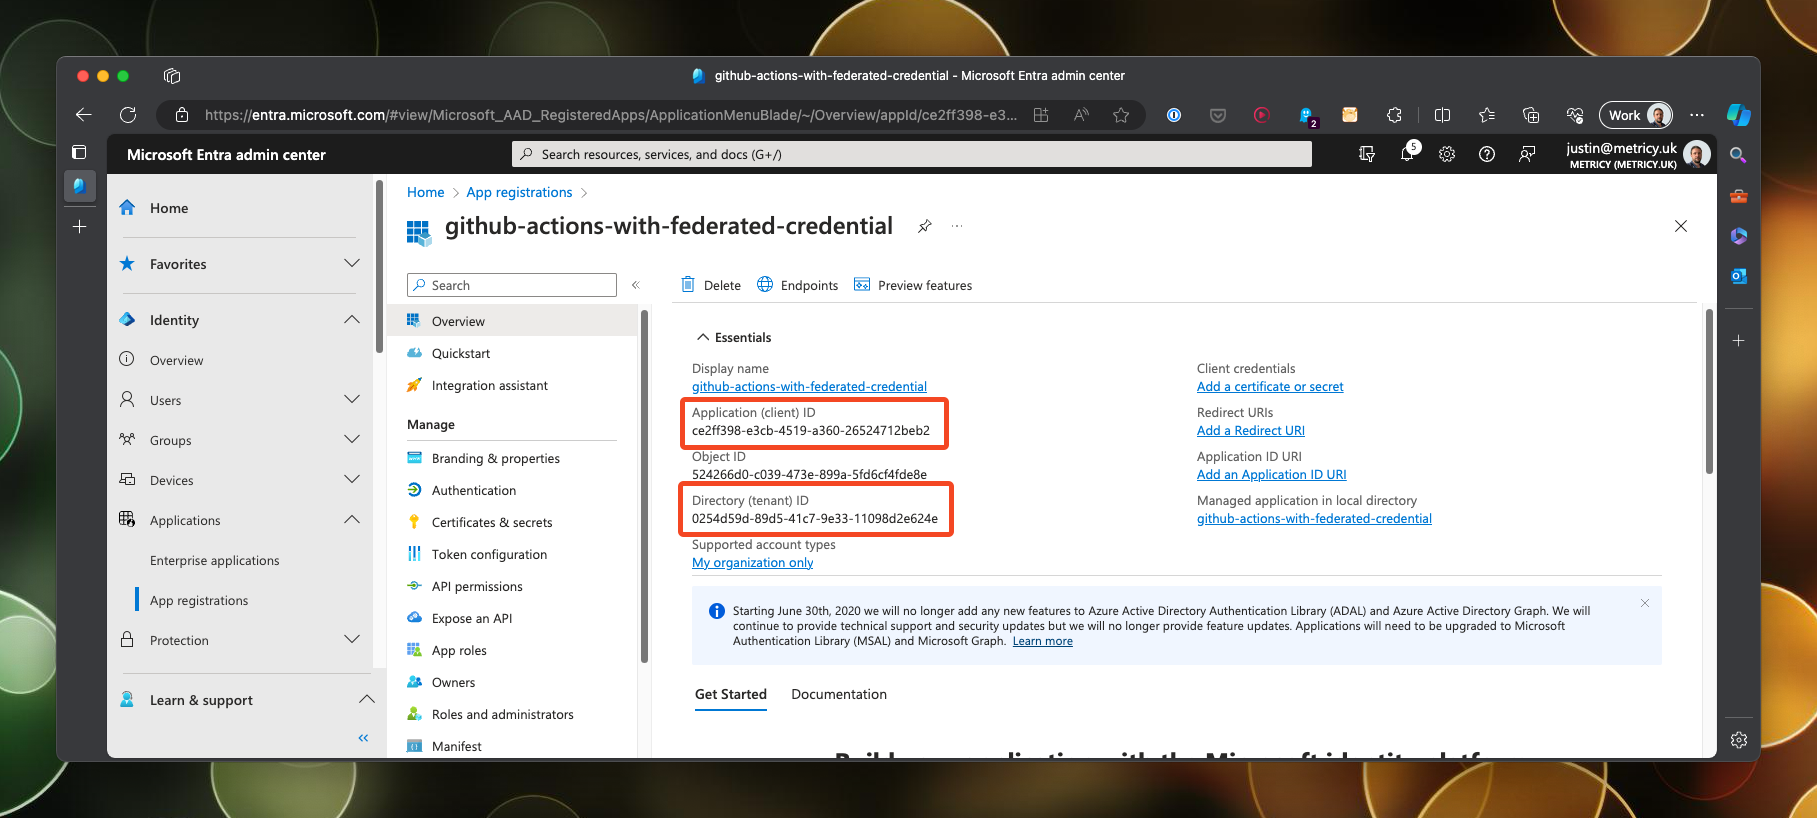
Once created, you will need to make a note of the client ID and the tenant ID, both of which will be needed to construct our secrets in Github.
Set permissions in Azure
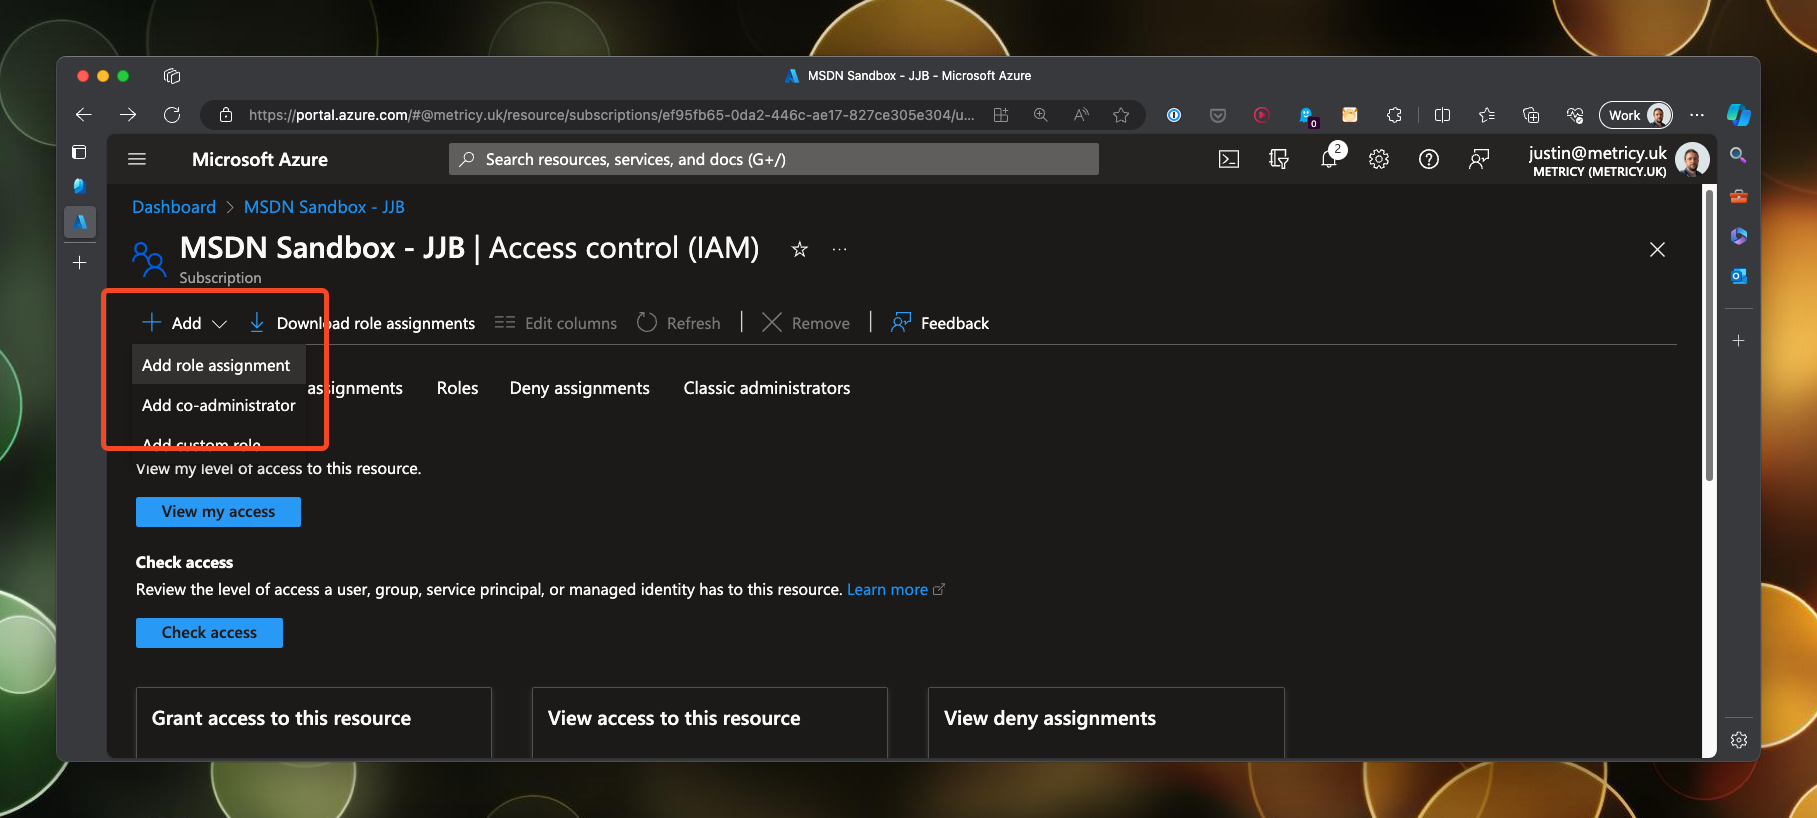
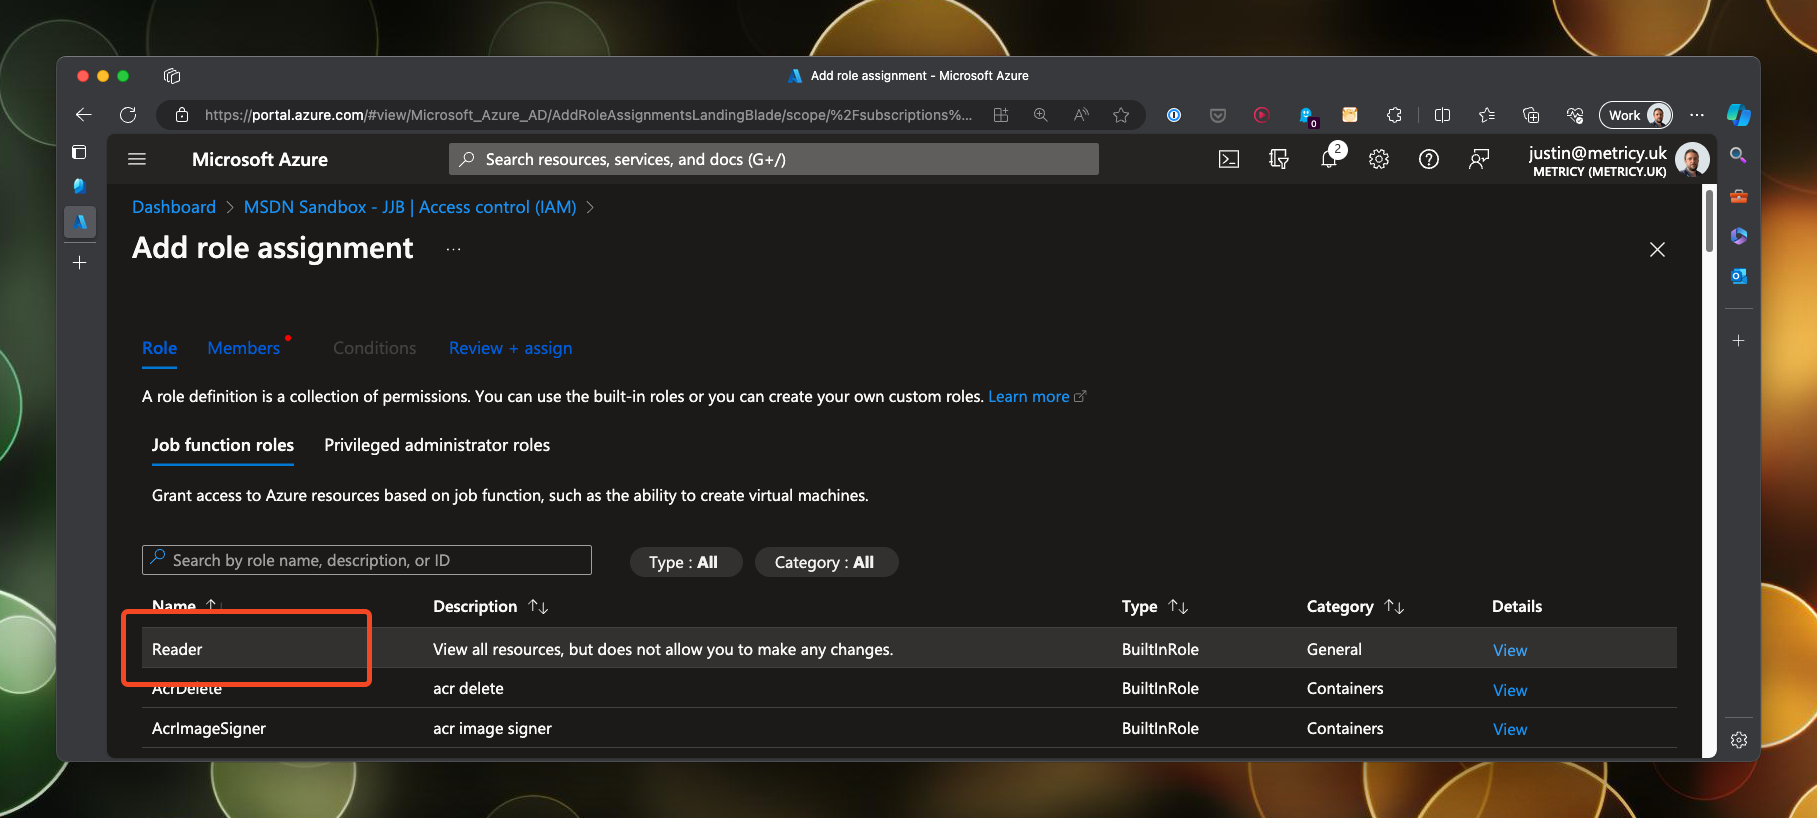
For this demo I want the service principals to be able to authenticate with Azure and list the resource groups that are present. This is a basic example to demonstrate the authentication and permissions are working. To do this I need to permit the service principals to read the resource groups in the subscription. From the subscription, navigate to the Access control (IAM) section and click on Add role assignment.
Select reader from the available function roles…
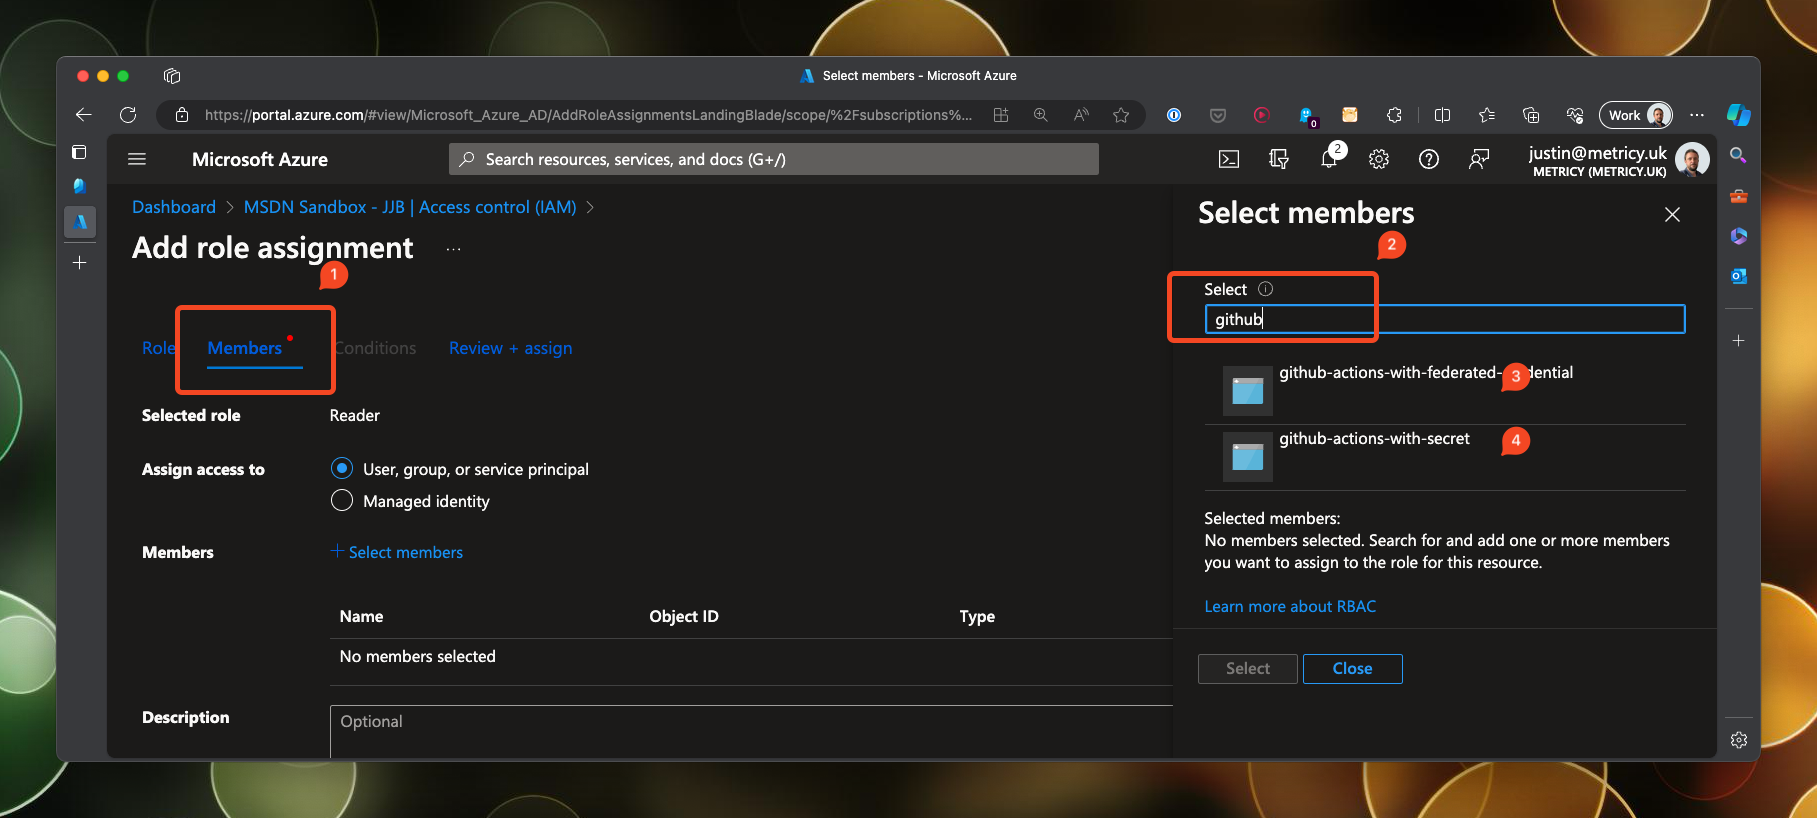
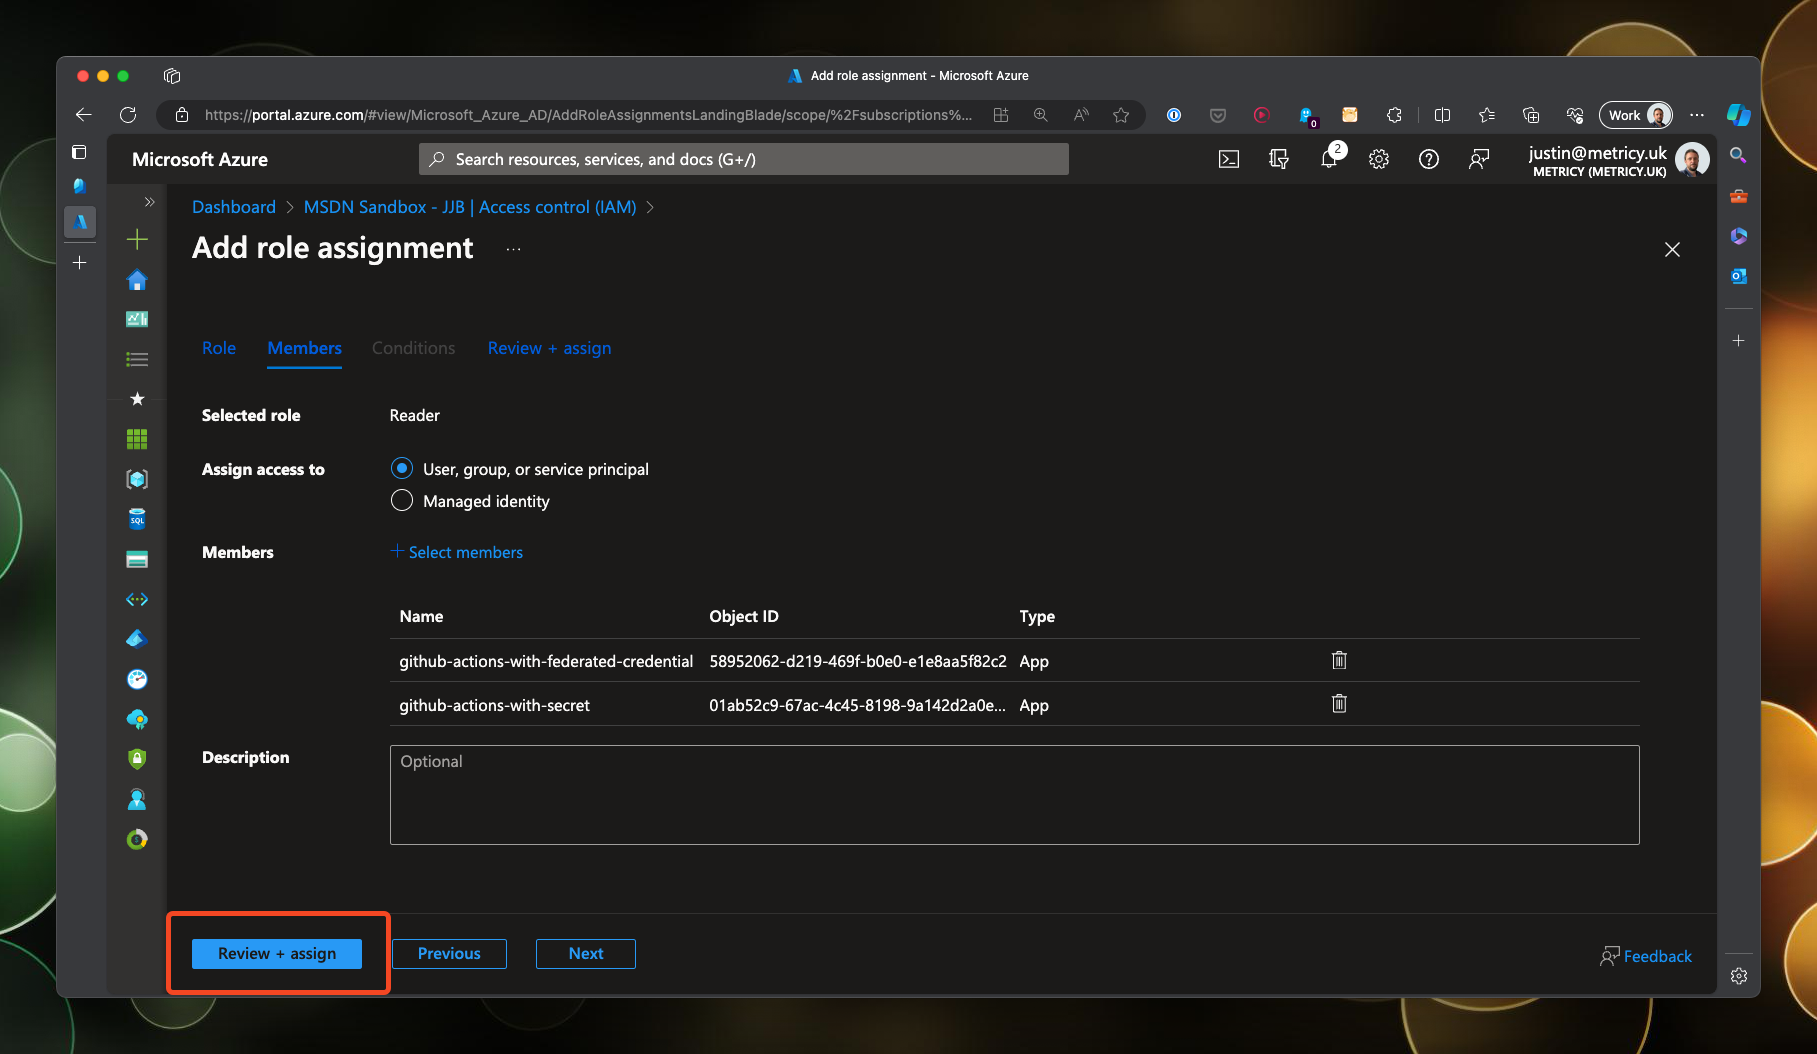
Then select the members heading and search for the service principals in the blade that pops out from the right. Click on them both to add them to the member list.
Once complete, click on Review + assign to confirm the role membership.
Create secrets in Github
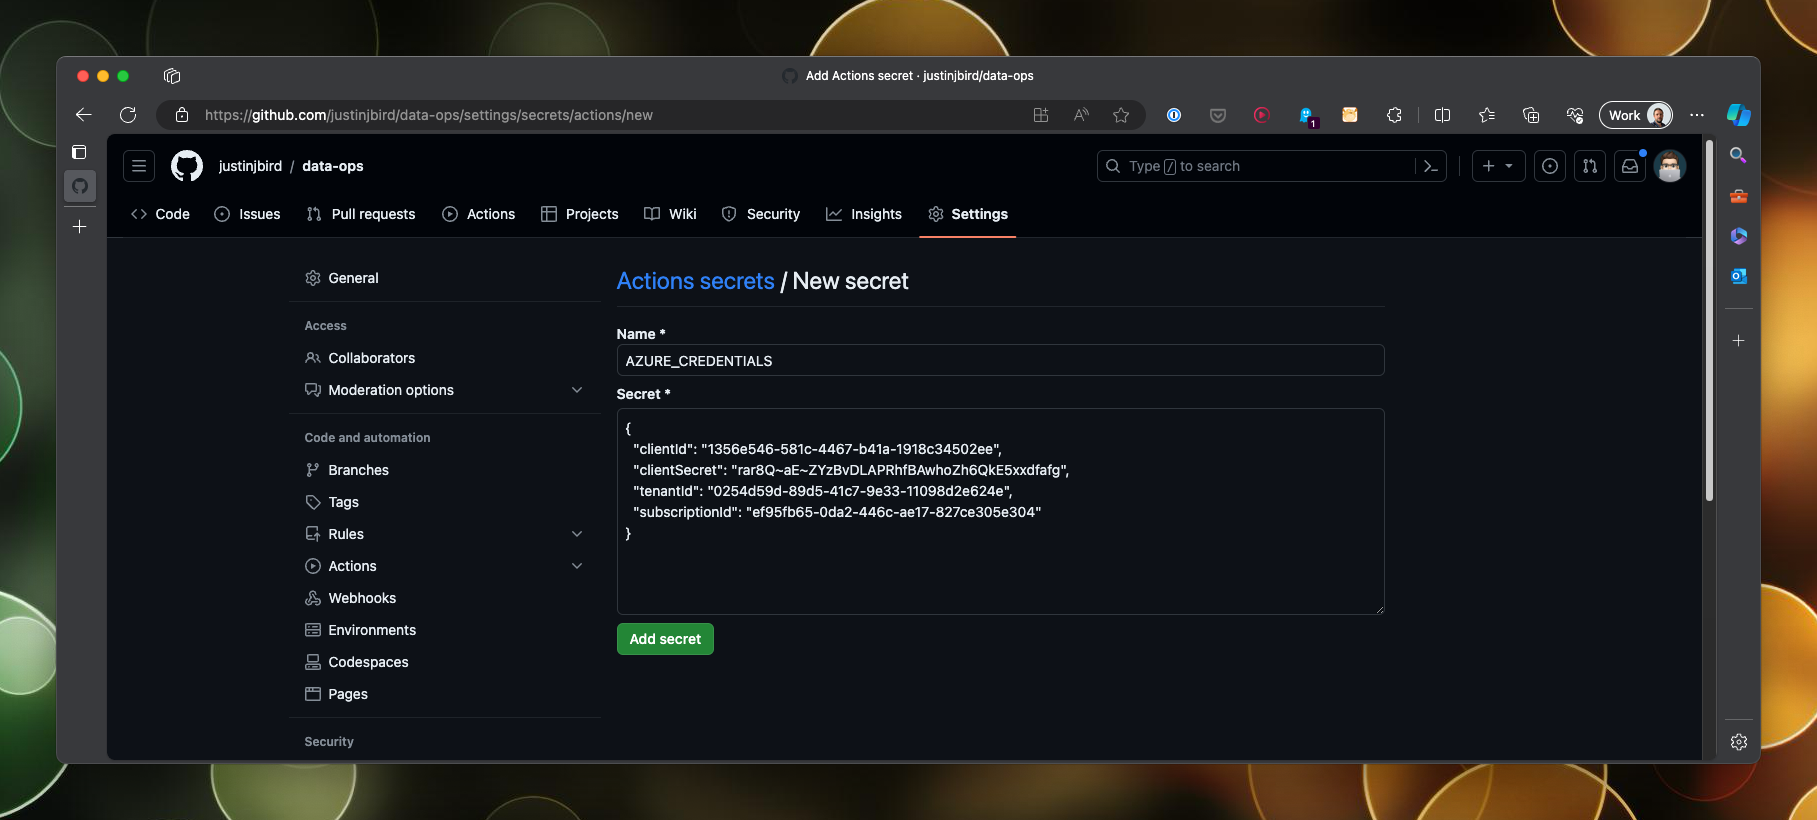
Next we need to set up secrets in our Github repository so that our workflow can use them to authenticate with Azure. Our service principal with secrets requires one secret, this will be a json object containing the client ID, the client secret, the tenant ID and the subscription ID. Using the IDs that you made a note of, construct a json object that looks like this:
{
  "clientId": "1356e546-581c-4467-b41a-1918c34502ee",
  "clientSecret": "rar8Q~aE~ZYzBvDLAPRhfBAwhoZh6QkE5xxdfafg",
  "tenantId": "0254d59d-89d5-41c7-9e33-11098d2e624e",
  "subscriptionId": "ef95fb65-0da2-446c-ae17-827ce305e304"
}
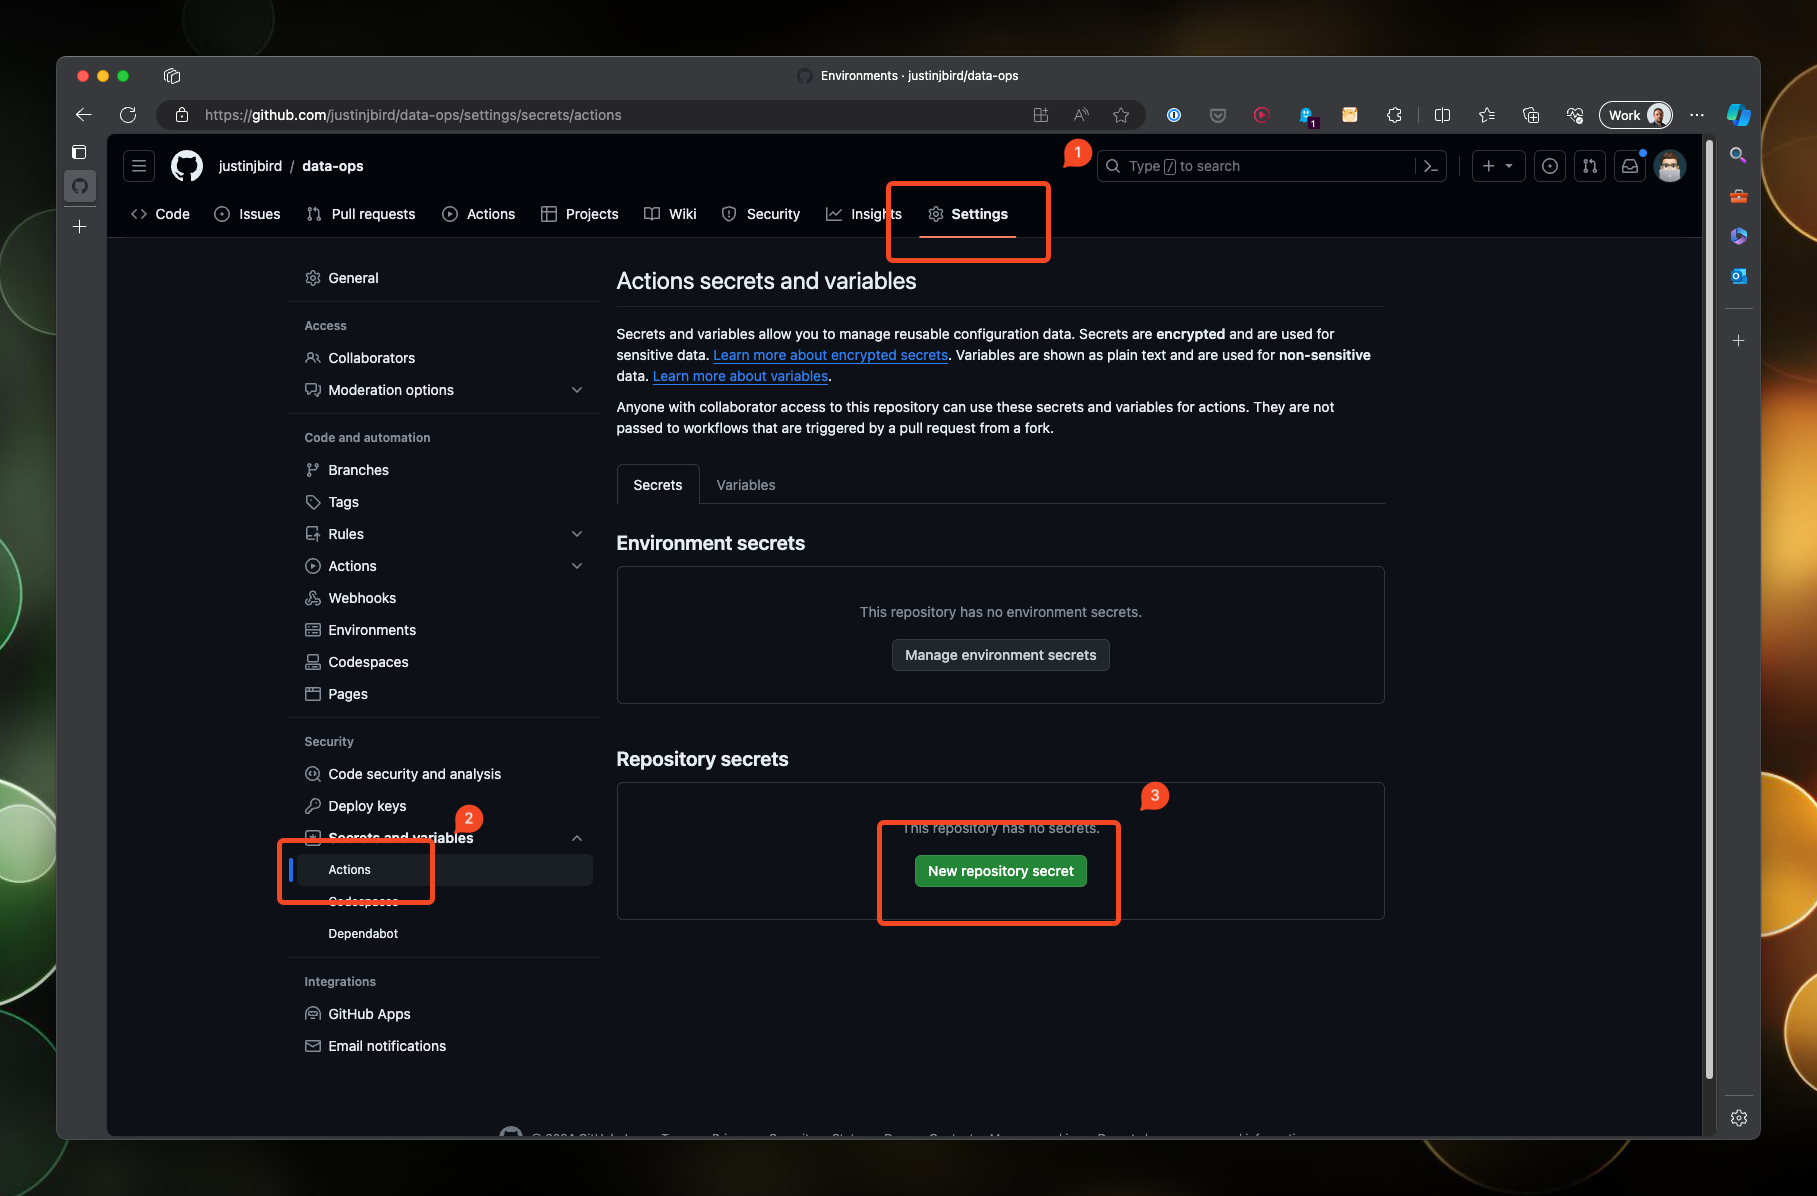
Navigate to your repository and click on the settings tab, find actions under secrets and variables, and click on New repository secret.
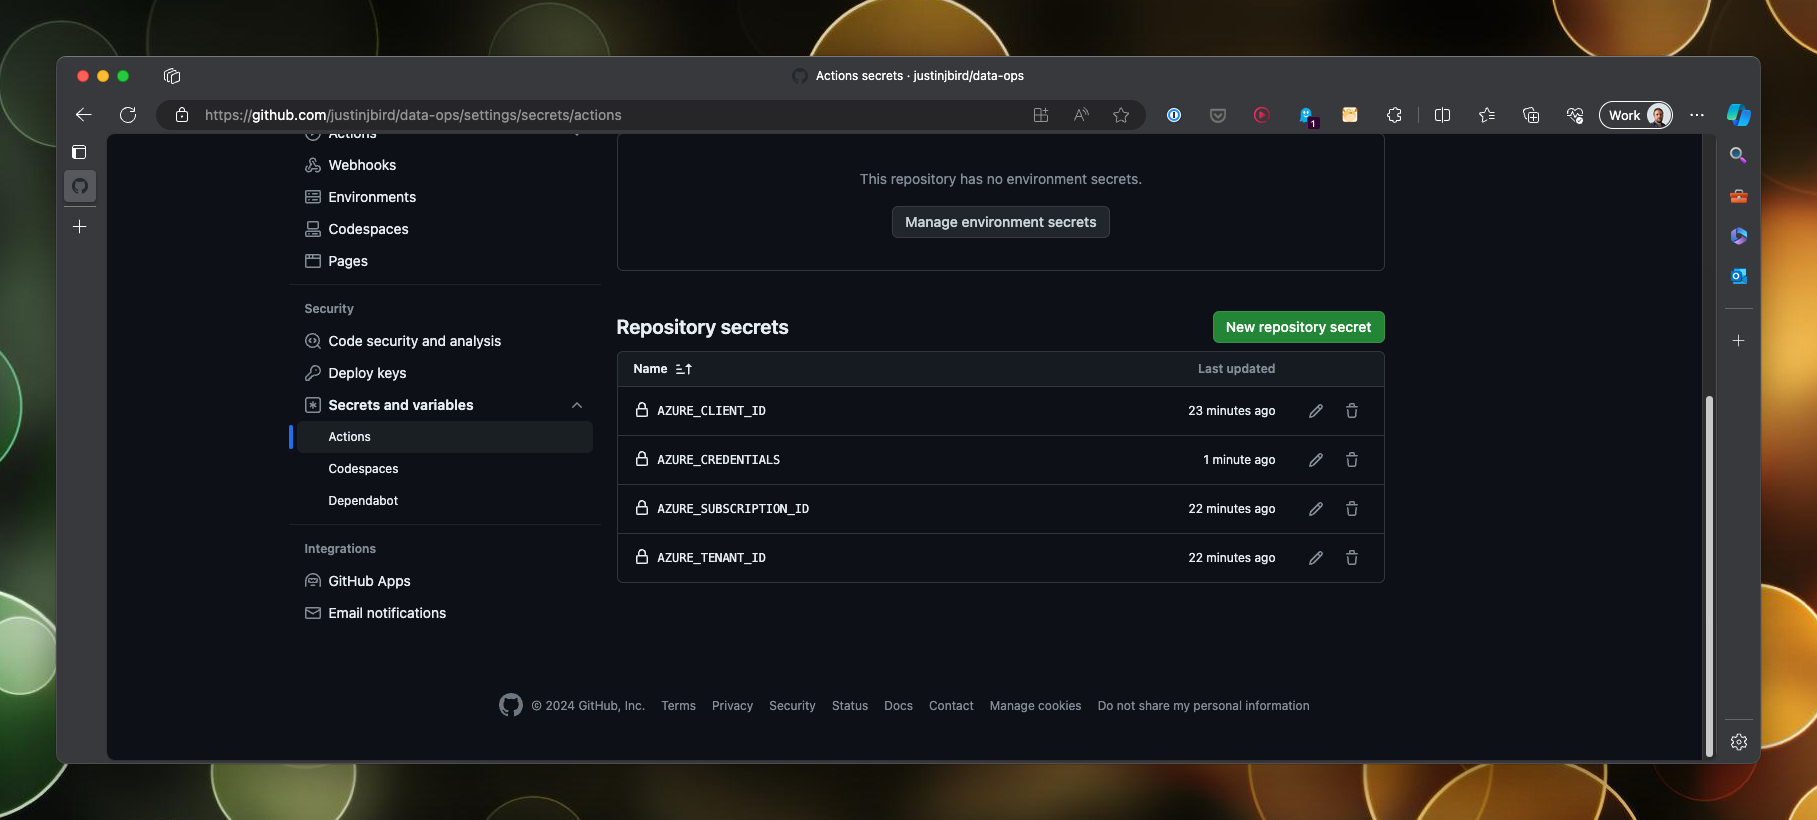
Give the secret a name, for example AZURE_CREDENTIALS. Paste in the json object and click Add secret. Repeat this for the service principal with federated credentials, creating three secrets as follows:
- AZURE_CLIENT_ID which will contain the client ID from the github-actions-with-federated-credential service principal.
- AZURE_TENANT_ID which will contain the tenant ID from the github-actions-with-federated-credential service principal.
- AZURE_SUBSCRIPTION_ID which will contain the same subscription ID as used above.
Once complete you should have a list of secrets that look like this:
Now we are ready to set up a workflow and authenticate with Azure!
Create a workflow
For this demo I am going to create two simple workflows that authenticate with Azure and list the resource groups in a subscription. This is a basic example to demonstrate the authentication and permissions are working. The first workflow will use the service principal with secrets and the second will use the service principal with federated credentials.
I have created a new repository for these demos, you can find that here .
Workflows are defined in a .yml file in the .github/workflows directory of your repository. I have created two workflows, one called with-secret.yml and one called with-federated-credential.yml. I won’t cover all aspects of a github workflow in this post, but I will show you the steps that are relevant to authenticating with Azure. The steps are defined in the jobs section of the workflow file and look like this:
steps:
  - name: Connect to Azure
    uses: azure/login@v1
    with:
        creds: ${{ secrets.AZURE_CREDENTIALS }}
        enable-AzPSSession: true
  - name: List Resource Groups
    uses: azure/powershell@v1
    with:
      azPSVersion: latest
      inlineScript: |
        Get-AzResourceGroup | ft
The first step is called Connect to Azure, it uses the azure/login action to authenticate with Azure. We are passing two inputs to this action, the first is the secret that we created earlier and the second is to enable a PowerShell session. This is required because we are going to use the azure/powershell action to list the resource groups in the subscription.
The second step is called List Resource Groups, it uses the azure/powershell action to run a PowerShell script that lists the resource groups in the subscription.
The second workflow is almost identical, the only difference is that we will replace the creds input with individual inputs for the respective secrets as you can see below:
steps:
  - name: Connect to Azure
    uses: azure/login@v1
    with:
      client-id: ${{ secrets.AZURE_CLIENT_ID }}
      tenant-id: ${{ secrets.AZURE_TENANT_ID }}
      subscription-id: ${{ secrets.AZURE_SUBSCRIPTION_ID }}
      enable-AzPSSession: true
  - name: List Resource Groups
    uses: azure/powershell@v1
    with:
      azPSVersion: latest
      inlineScript: |
        Get-AzResourceGroup | ft
Each secret we created earlier is mapped to an input in the azure/login action.
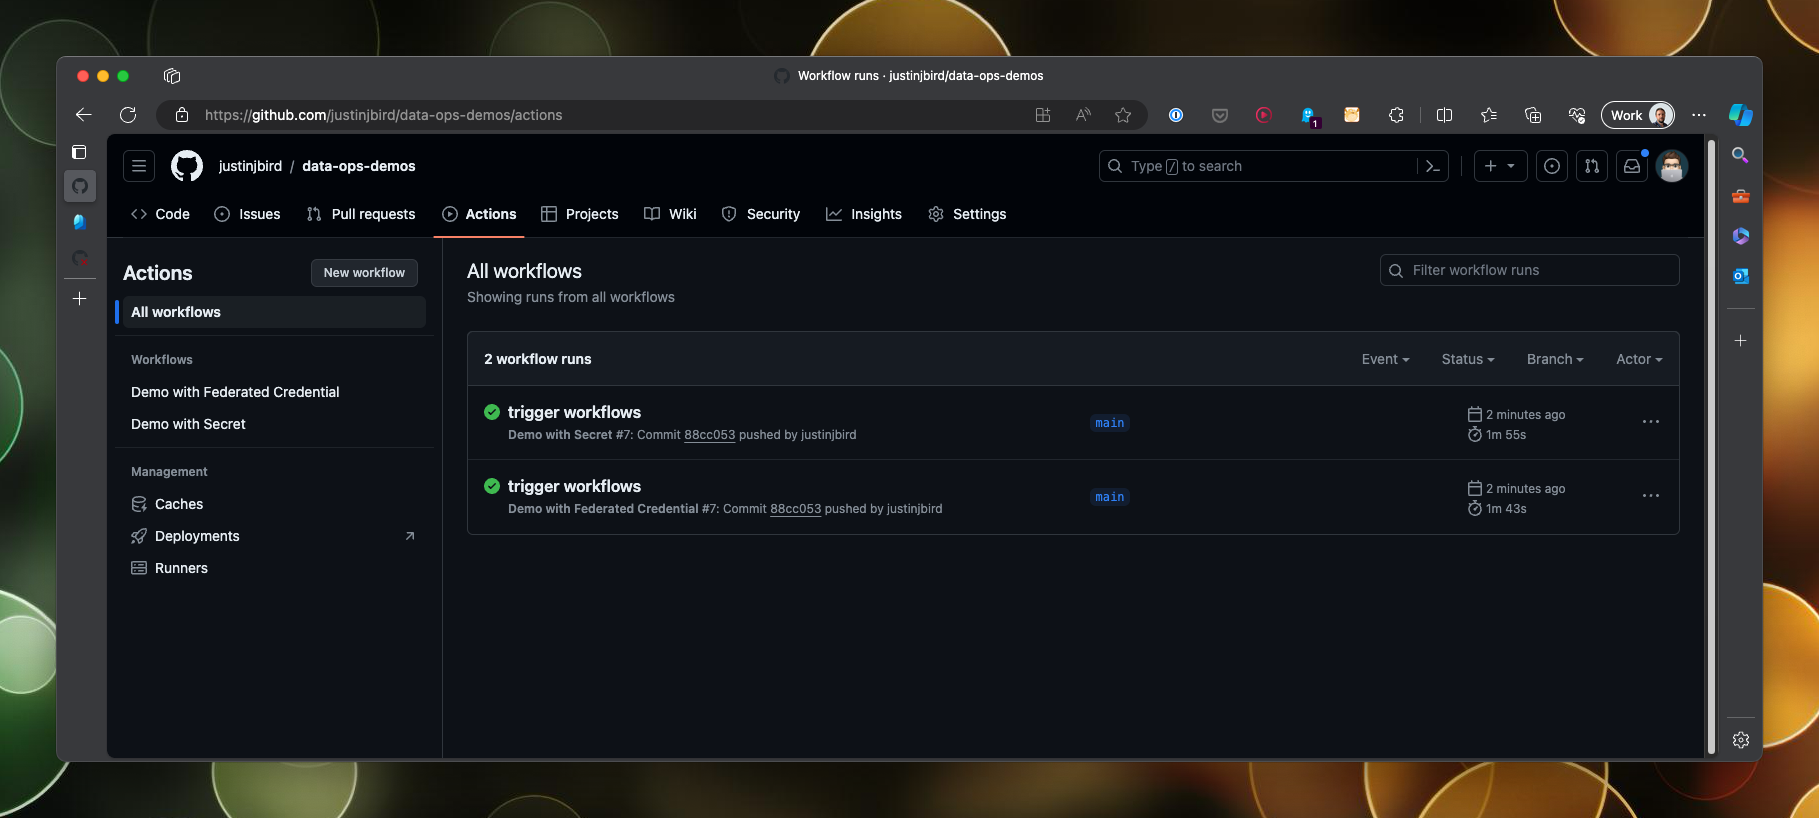
Run the workflows
I have set up the workflows to auto-run when changes are made to their respective files, so pushing these changes to the repository will trigger the workflows. The workflows will run and you can see the output in the actions tab of the repository.
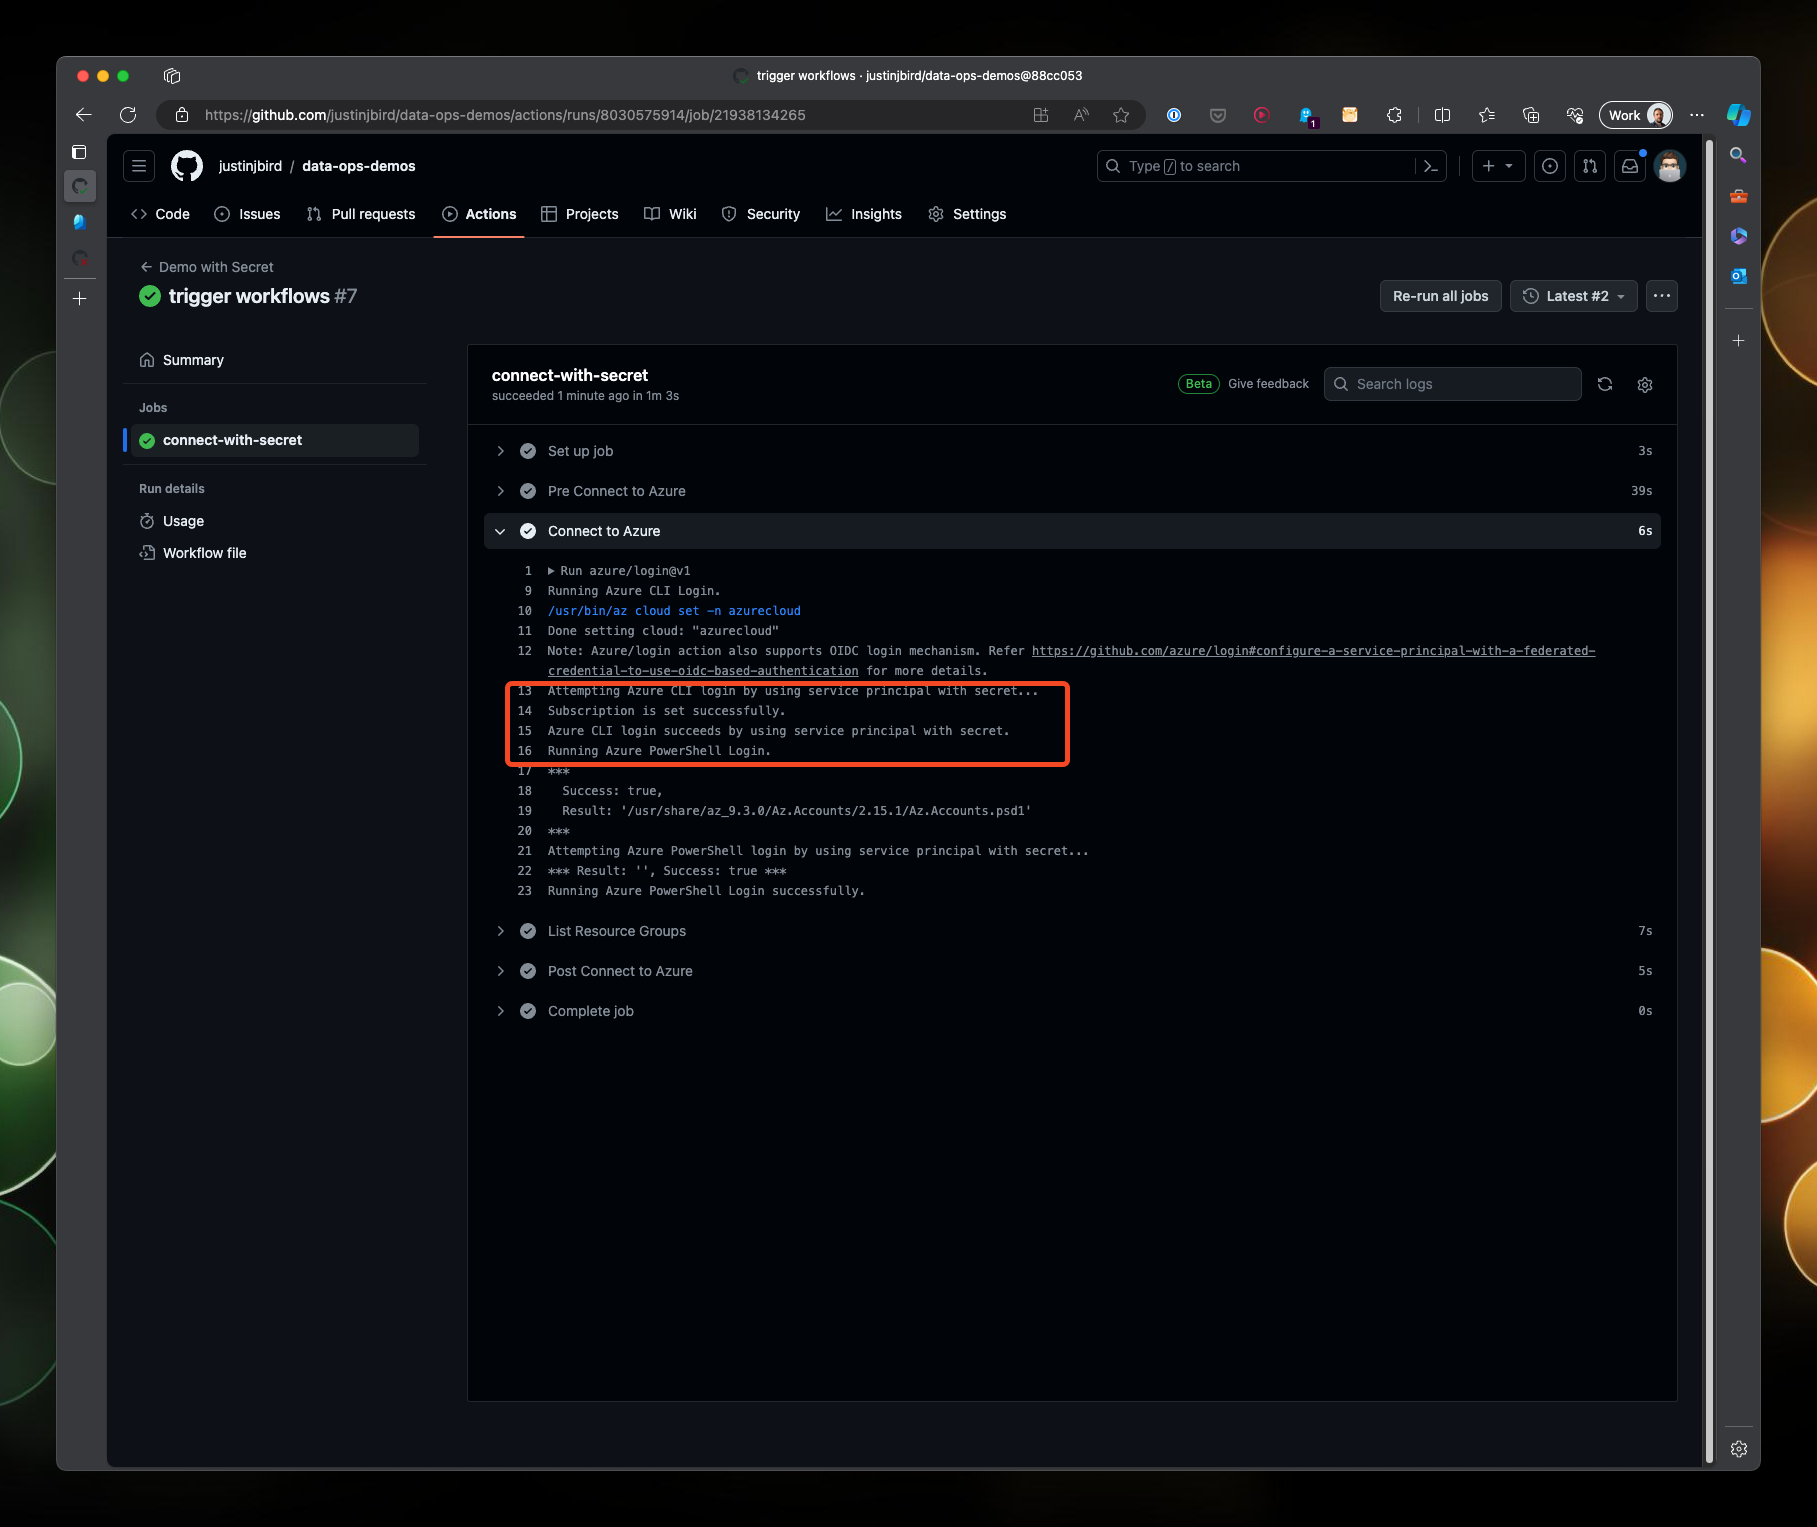
Drilling into both workflows, you can see that they have both authenticated with Azure using their respective authentication methods:
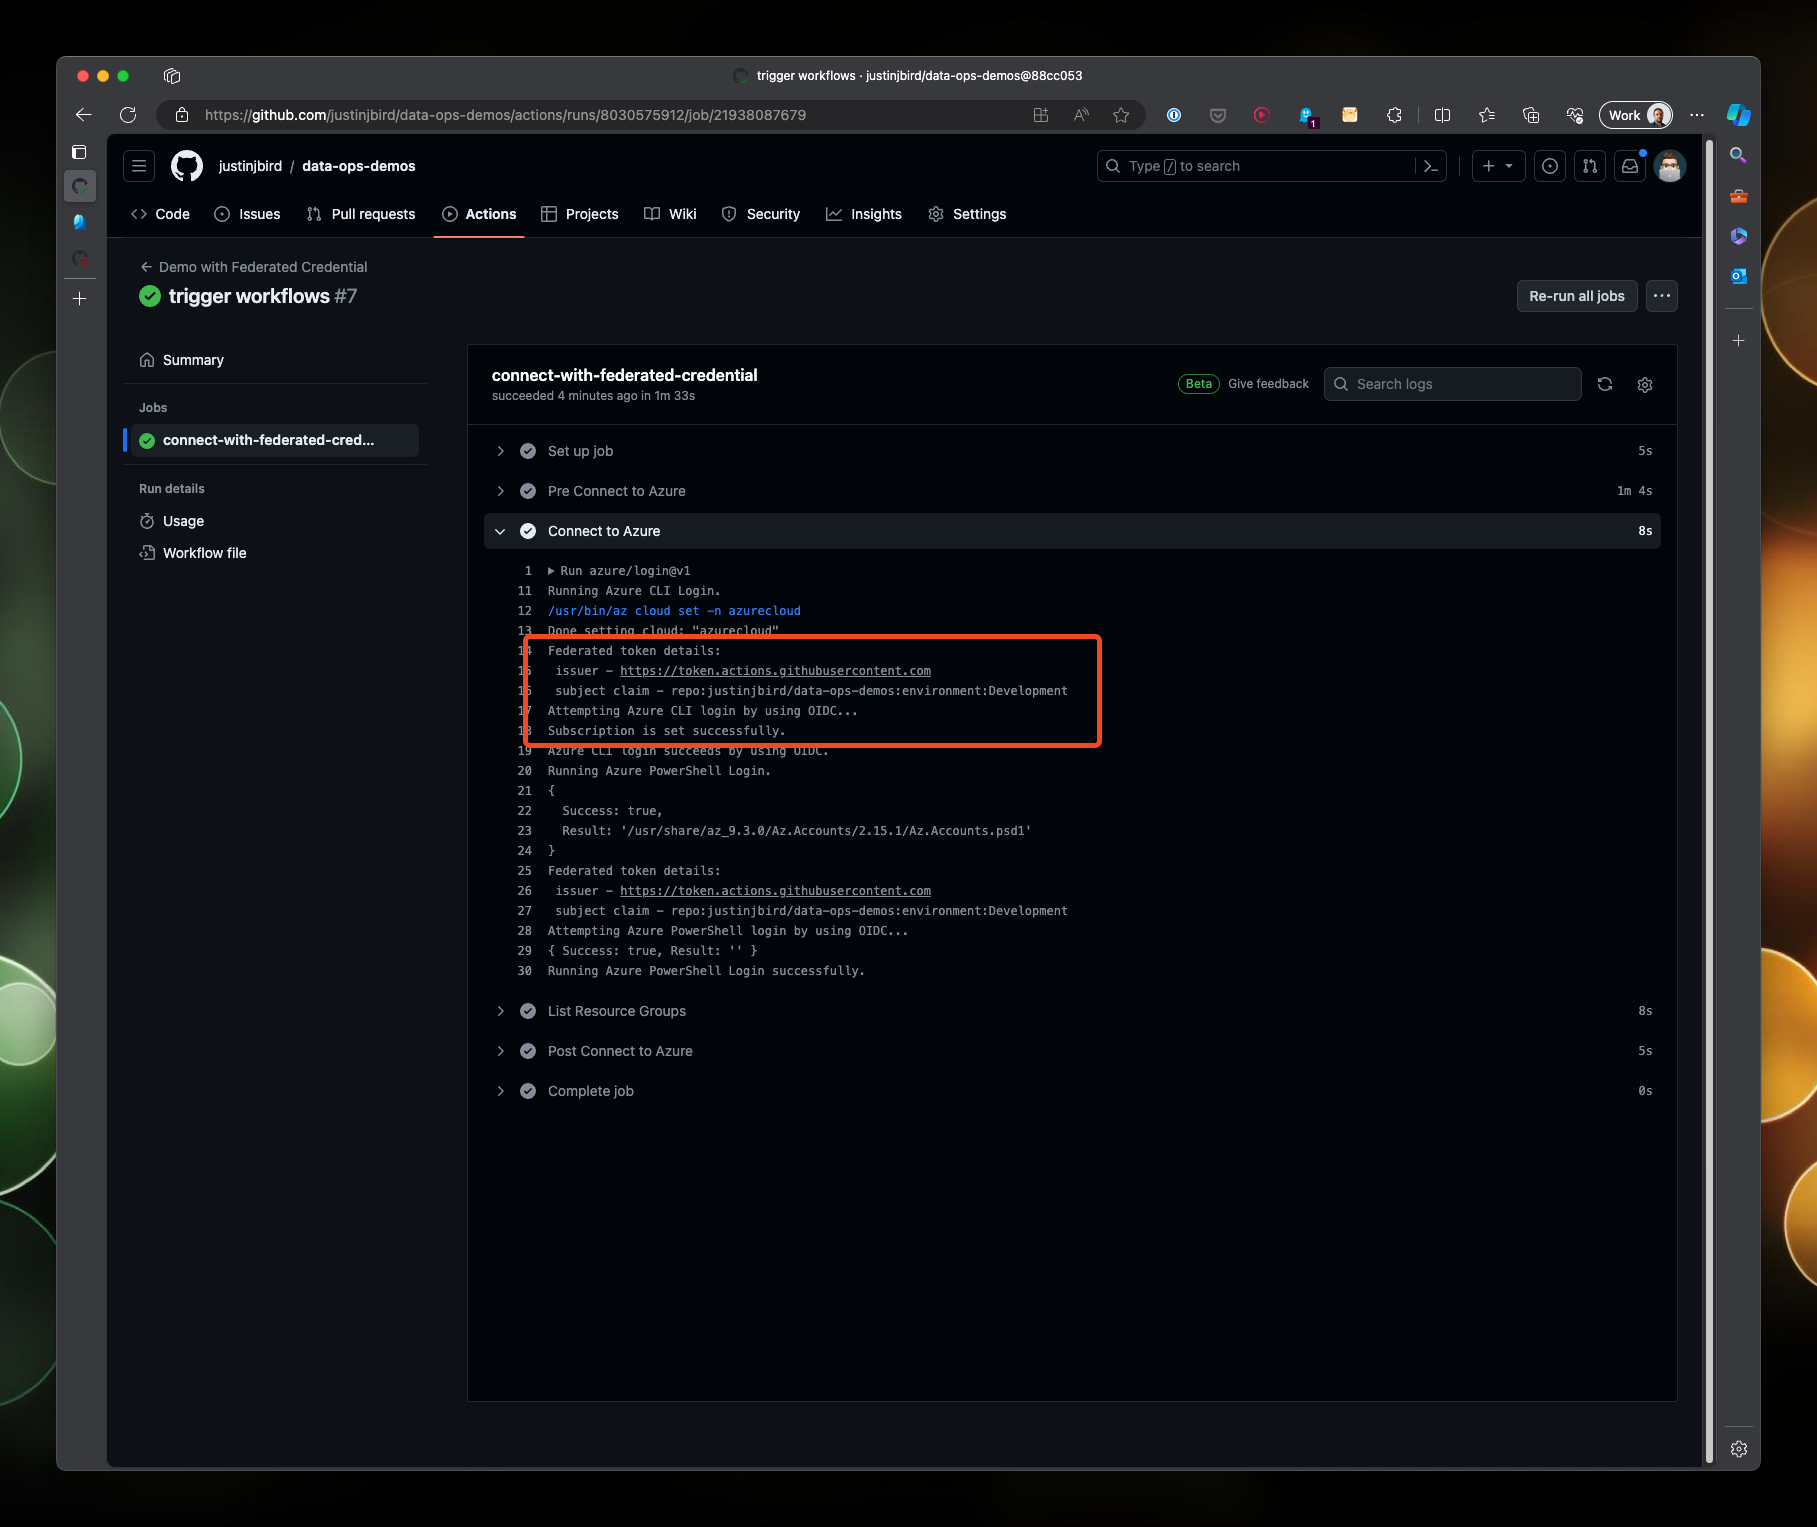
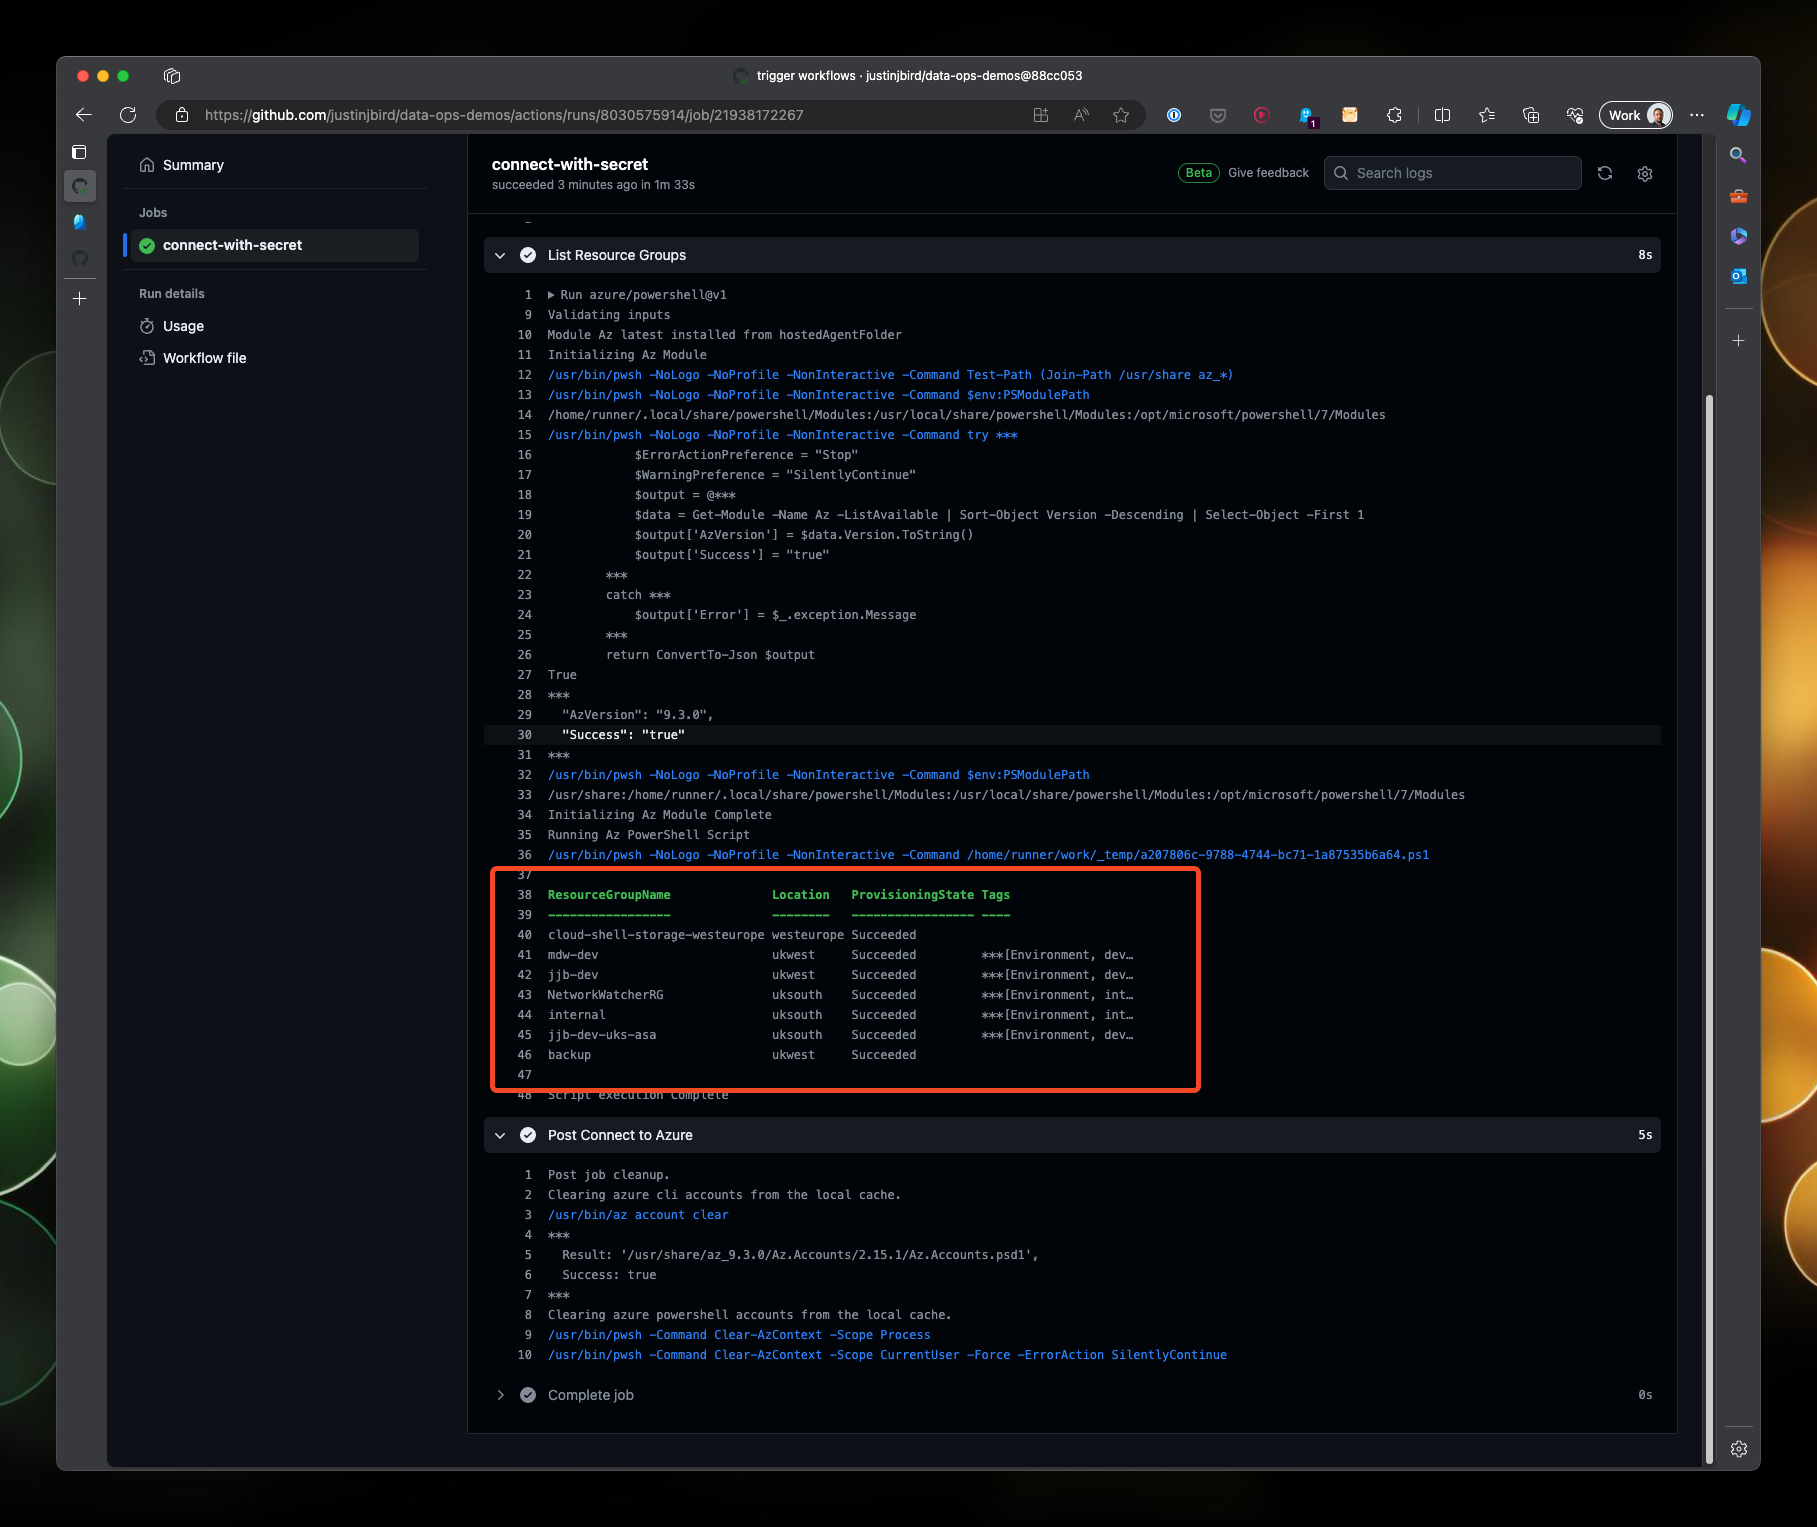
Finally, you can see that both workflows have listed the resource groups in the subscription:
Next steps
This is a basic example to demonstrate the authentication and permissions are working. In a real world scenario you would want to use a service principal with federated credentials to authenticate with Azure from Github Actions. From here, you can extend the workflows to interact with other Azure resources, for example deploying resources, running scripts, or interacting with data services. This will require you to assign service principals to roles in Azure to grant access to the resources you want to interact with. You can also set up alternative federated credentials for different repositories, or different scenarios, to extend the scope of your workflows.
In future posts I will explore how to use Github Actions to interact with other Azure resources. I will also cover how to do similar tasks in Azure DevOps.
Useful Links
Tags :

#mtfbwy