
Steps required to rename the Default Branch in Github
Table of Contents
A long time ago in a galaxy far, far away…
This post is over 12 months old, that's a long time in tech! Please be mindful of that when reading this post, young Padawan, as it could be outdated. I try to keep things up to date as much as possible. If you think something needs updating, please let me know in the comments.
Introduction
It has been more common place to use main as the default branch in Git. This is straightforward for new repositories, but what if you want to change a repository already connected to a remote repository. This is a quick guide on how to rename the default branch in Git. Consider that this is a breaking change, anyone making use of this repository will need to update their local environments once you rename the main branch of the remote repository.
Rename remote branch
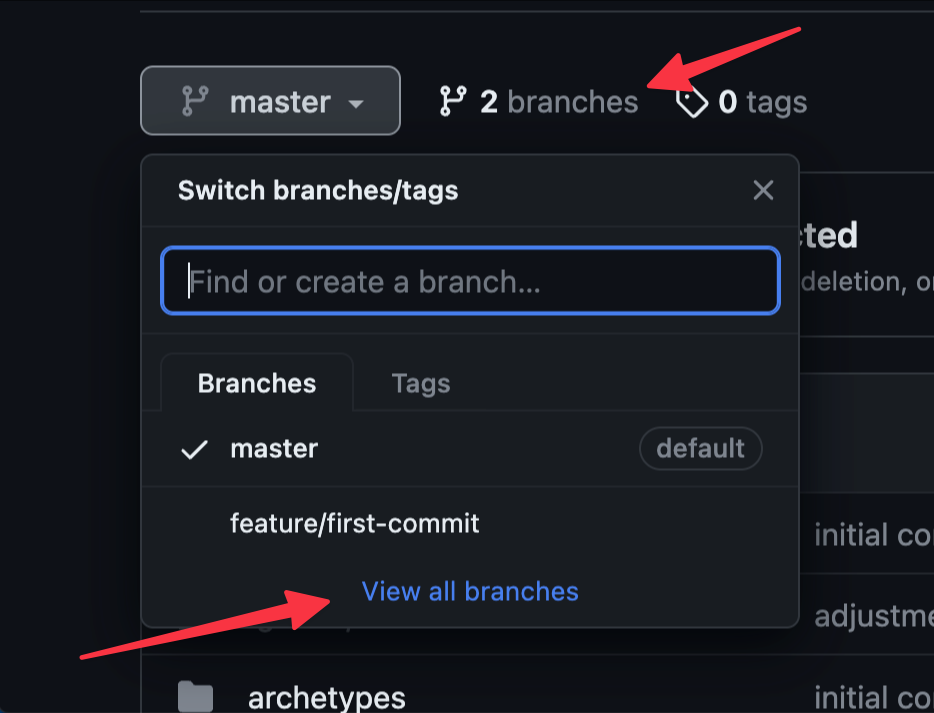
First, you need to rename the remote branch on Github. To do this, go to the repository and navigate to the branches view. You can do this by clicking view all branches on the branch drop down or by clicking the branch icon just to the right of the active branch.
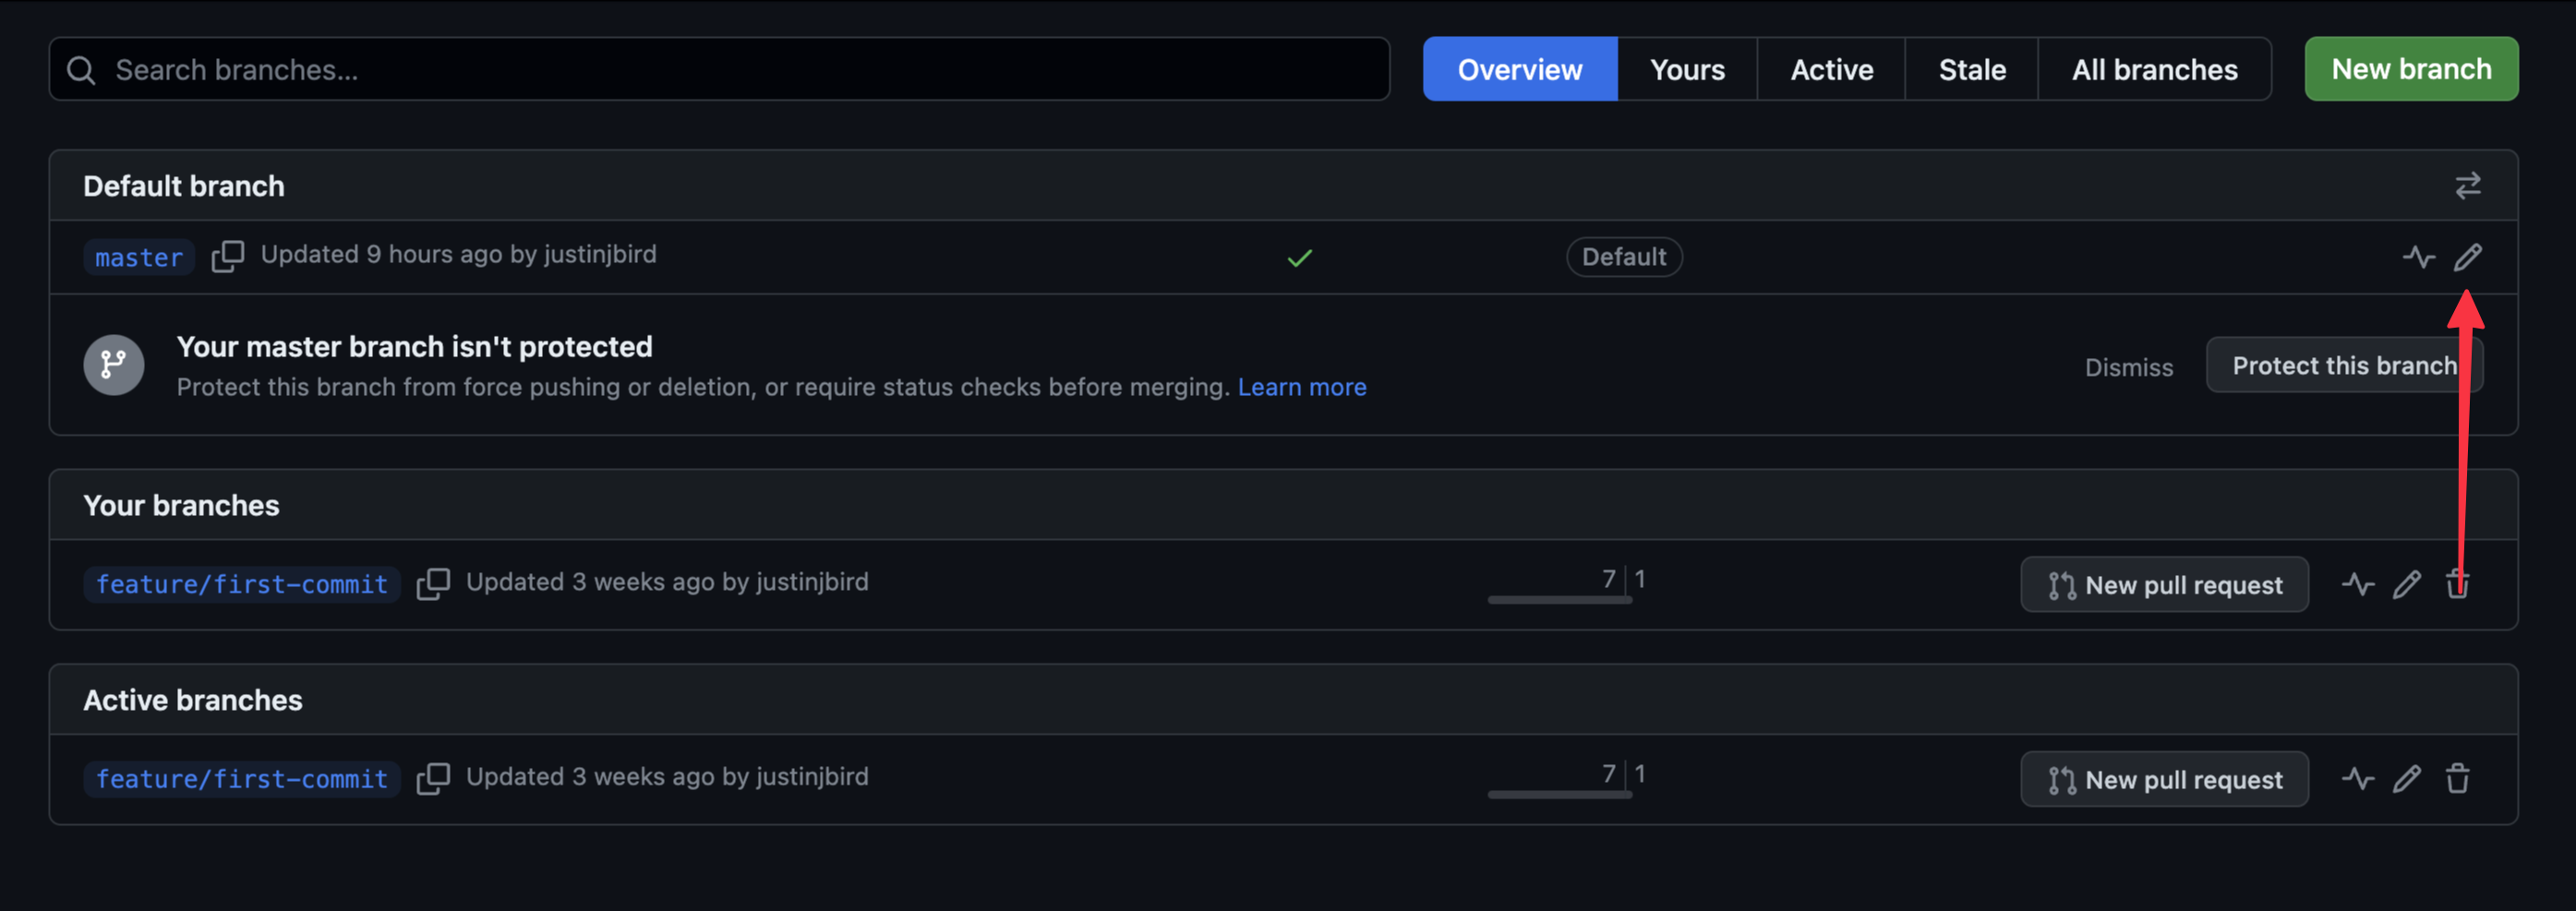
To rename the branch, click on the pencil at the right hand side of the master branch.
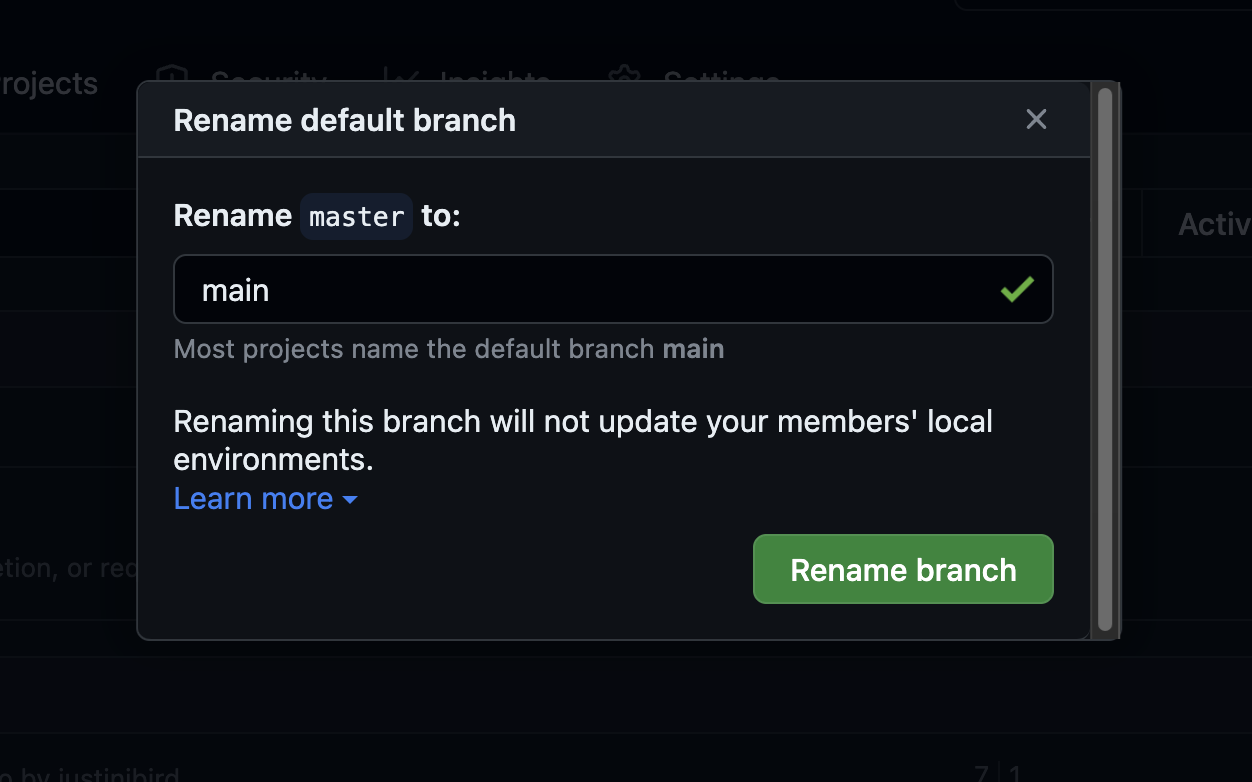
Enter the new branch name and click rename branch. Observe the warning, that this won’t update any local environments. We need to do this next!
Rename local branch
With the remote branch fixed up, you then need to make the same change to your local environment. To do this, you need to rename the local branch and then update the remote branch to track the new branch name. The following commands will rename the branch and update the remote branch to track the new branch name where OLD-BRANCH-NAME should be replaced with the name you are renaming and NEW-BRANCH-NAME is the new name. The optional command will remove the tracking of any branches that no longer exist on the remote repository, in our case that would be the reference to the master branch.
git branch -m OLD-BRANCH-NAME NEW-BRANCH-NAME
git fetch origin
git branch -u origin/NEW-BRANCH-NAME NEW-BRANCH-NAME
git remote set-head origin -a
##optional
git remote prune origin
So for our example, to change master to main, the commands would look like this…
git branch -m master main
git fetch origin
git branch -u origin/main main
git remote set-head origin -a
##optional
git remote prune origin
If all is successful, the output would be something like the following…
branch 'main' set up to track 'origin/main'.
origin/HEAD set to main
Pruning origin
URL: https://github.com/justinjbird/site-blog.git
 * [pruned] origin/master
Summary
Pretty straight forward! If you intend to run through these steps, remember that EVERYONE who is using this repository would need to follow the second step to update their local repository. It should therefore be discussed and planned in a controlled way to ensure no disruptions.

#mtfbwy