Automator Convert image to Webp Quick Action
- mac
- 2023-05-24
- 6 minutes to read
Introduction
This blog has lots of images, typically they start out as PNGs. I tend to convert them to WEBP because it is a more efficient file type for the web. I have tried to improve this process a few times because it’s a bit of a chore.
Previous Attempts
Using an app
Initially, I would use PIXLR to export as WEBP but this is a real chore because I would have to upload the image then export back to WEBP. It also isn’t cool if you want to convert a lot of files! So then I decided to progress to working out how to do this using the command line because automate anything you do more than a few times!
Command line
I don’t really do much with the MacOS command line so know that I have googled this code and it’s a little limited…
find ./content/ -type f -name '*.png' -exec sh -c 'cwebp -lossless -quiet $1 -o "${1%.png}.webp"' _ {} \;
How this works is it lists all PNG files within the directory ./content/ and all subdirectories using the find command. Essentially it just returns a list of filepaths. It then passes each file to the second command (the exec) which is running a command line utility called cwebp that encodes images to WEBP and saves it to the same directory as the PNG.
It’s limited because I can only provide a single path. Suppose I wanted to ignore one of the subdirectories in the content directory, I can’t really do that so I would have to do each subdirectory one at a time.
This was handy to do bulk update of all my images and that limitation wasn’t a deal breaker because I just backed out the changes I didn’t want using git within VS Code. Cheating a bit I know…I could have learnt how to give my find command more control but it was good enough.
Now that I have done the bulk encode, I tend to forget where the script is and it’s a little more clunky for specific conversions because I have to update the script. So what I really want to do is make use of MacOS automator and turn this script into a quick action.
Create Quick Action
A quick action is a workflow that you create using Automator. I am not going to go into too much details about what it is, how it works, you can read more about it here . I went through a little pain getting this working so here are the steps I went through.
Note, Quick Actions used to be called Services. Many help discussions on the web refer to services but for whatever reason, Apple has renamed this type as Quick Actions in more recent versions of MacOS.
Prerequisites
To follow a similar approach, you will need an encoder called cwebp which can be found here but can also be installed using homebrew (details here ).
Start up Automator
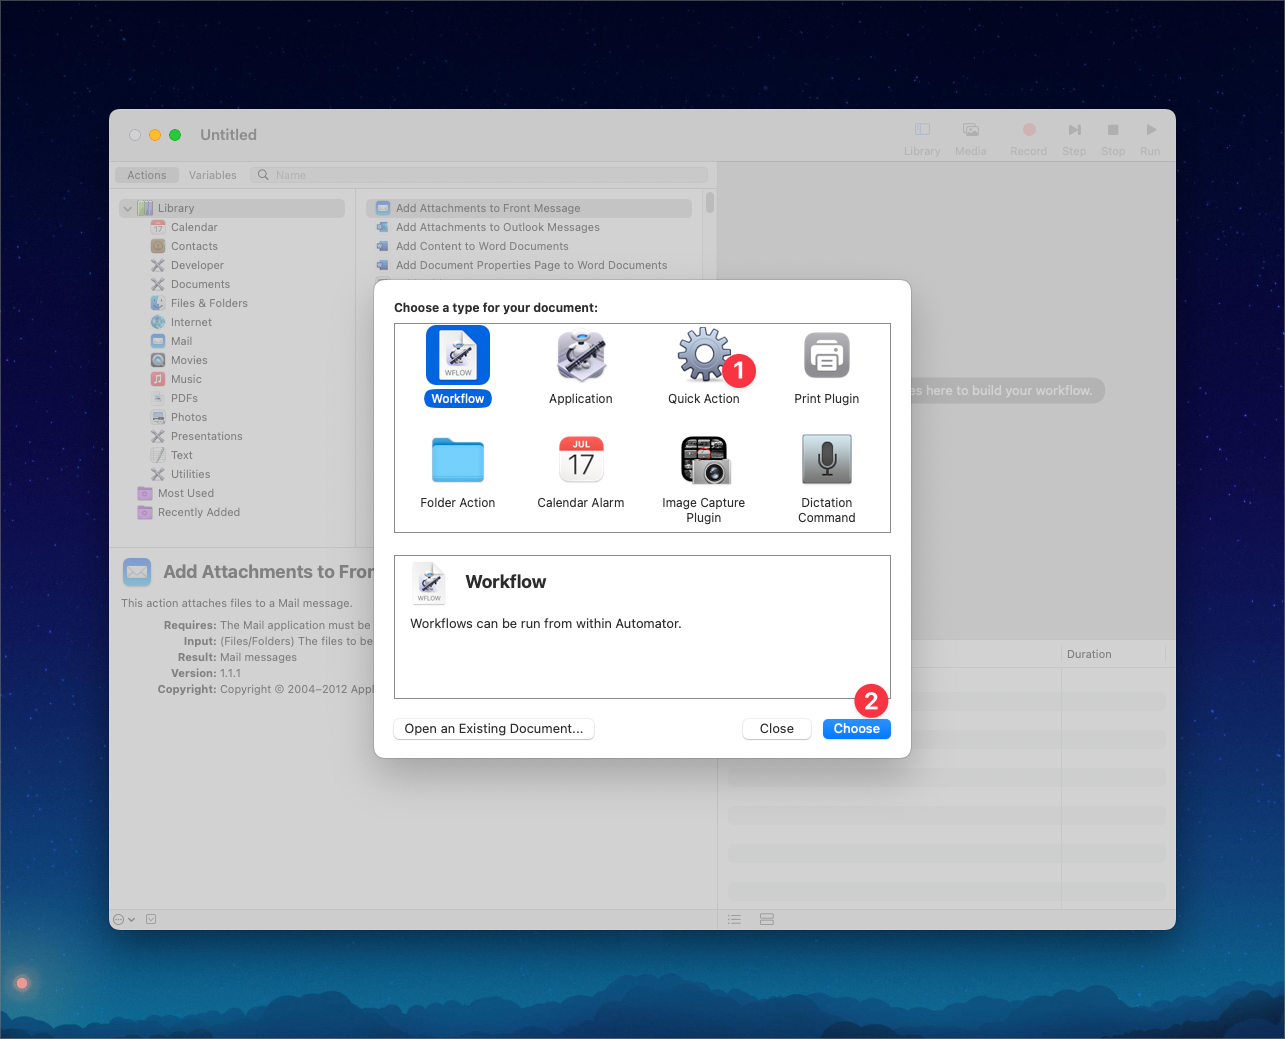
Opening Automator up, I am asked what sort of item I want to create. I am going to create a quick action.
I am then presented with a development area that allows me to configure the quick action. The left hand pane shows a list of actions and the right hand pane is the actions chosen for my workflow, which is currently empty.

In the top right there are some options that need to be configured. Workflow receives current describes in what context will the action be triggered. I specifically want an action available when I select an image so I have selected image files here. The second drop down describes which applications this action will be available from. I specifically want this available from Finder so I have selected Finder. The other two options allow you to configure the icon presented alongside the action name in the Finder context window, I have left them with the default settings.
Add a shell Action
I want to run some code! To do this, I need a shell action. In the left hand pane I have filtered the action list by the word “shell” and there is an available action called “run shell script”. I can drag that action into the workflow pane.
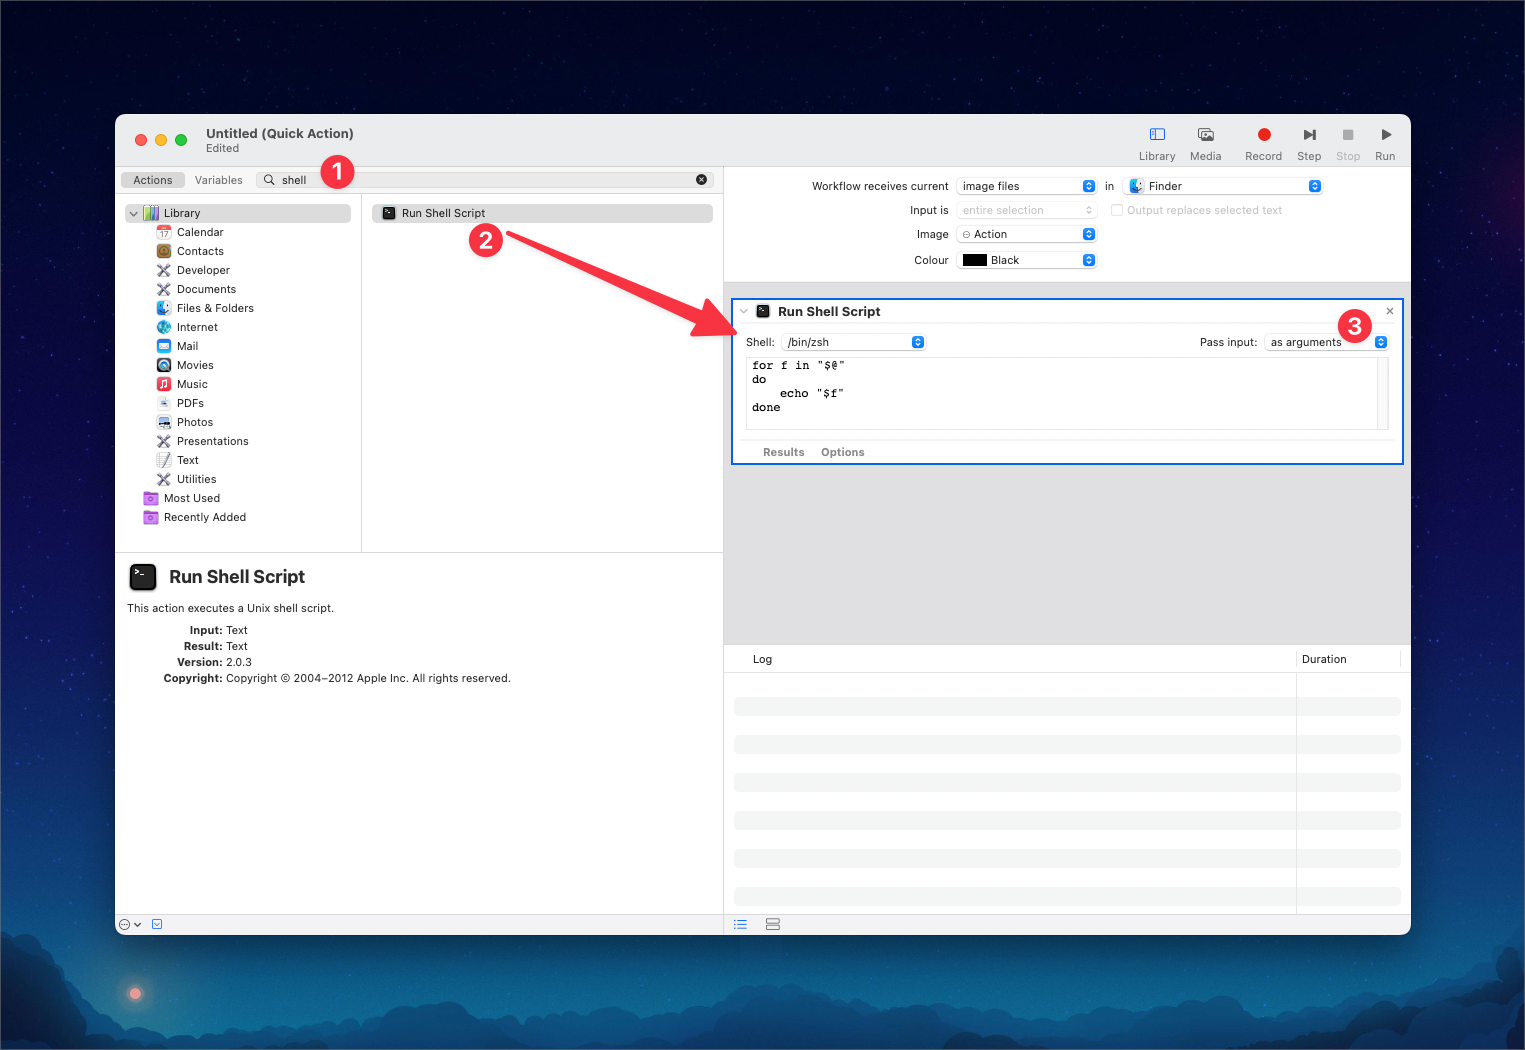
I only want my code to convert files I have selected. When I select files in Finder I can choose for them to be converted, the files will be listed by the workflow and can be referenced using the argument $@ however, I need my action to accept arguments from the workflow. To do that I need to change the pass input dropdown to as arguments this will allow me to reference the $@ object.
Alter my code
Since I don’t need to do the find (I am not finding files, because my selection in Finder will be the files that are processed) my code needs changing a little. The argument $@ will have one or more files listed in it. All I need to do is run a loop over the files and run the convert.
for file
do
  ext=${file##*.}
  if [ "$ext" = "png" ];
    then
      /opt/homebrew/bin/cwebp -lossless -quiet "$file" -o "${file%.png}.webp"
      rm "$file"
    else
  fi
done
The loop starts with for file which creates a variable called $file and by default will loop through all records in $@ so basically this is shorthand for for file in $@. I have put a check in that the file is a PNG, so the rest of the commands won’t run unless the extension found is PNG. If it finds the value PNG in the variable $ext then the cwebp command is run converting the PNG to WEBP and finally the original file is removed.
Testing the workflow
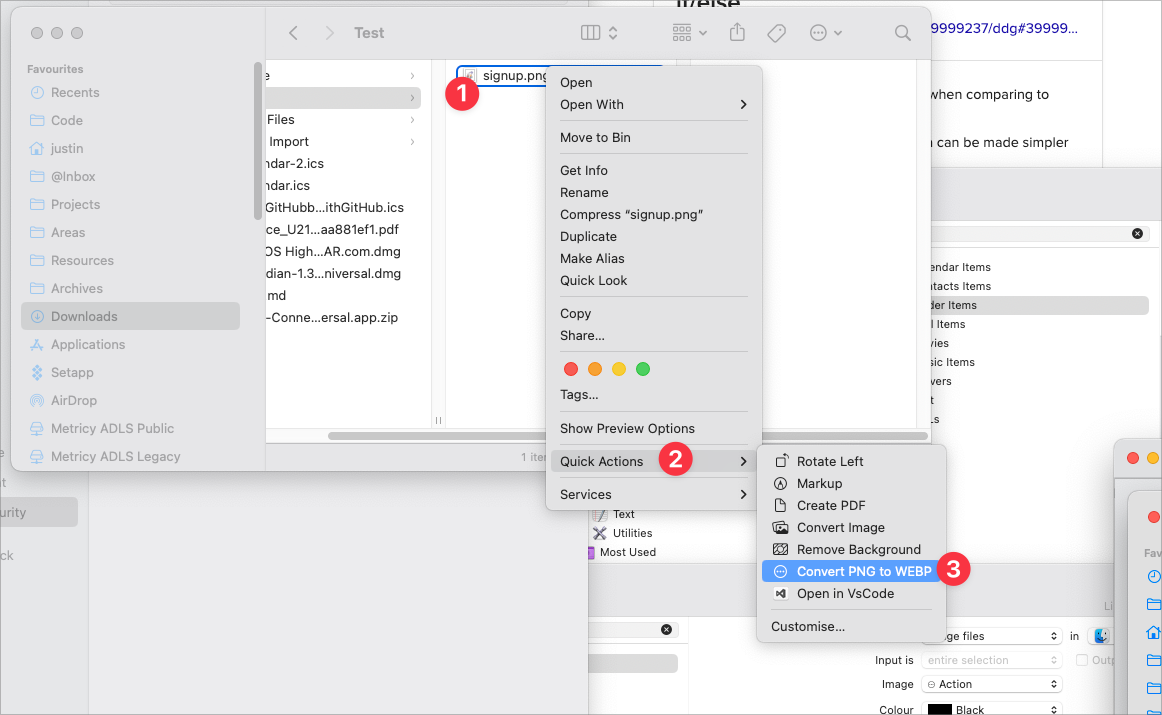
I can now save the workflow and test it! When I click save, I can give the action a name and then head over to Finder to see if it has worked. I have set up a test directory with just one file in it. If I right click on the PNG file my workflow should appear in Quick Actions. Clicking it will then convert my PNG to a WEBP file and remove the PNG file.
Summary
I have now got a script that I can call from the Finder window which allow me to convert multiple files from PNG to WEBP with a few clicks. Here is a short clip showing the command converting all of the files for this post into WEBP files in one click!
Pretty Cool! No more needing to mess round with scripts!
Tags :

#mtfbwy